Manipulating a 'Drop Shadow'
(Page 2)

Clive R. Haynes FRPS

So, how do we separate the shadow from the subject?
Once again Photoshop provides the solution
.

Note: The route depends upon which version of Photoshop you have. For the latest versions of Photoshop CS and CC, continue. For older versions, scroll down the page.
 

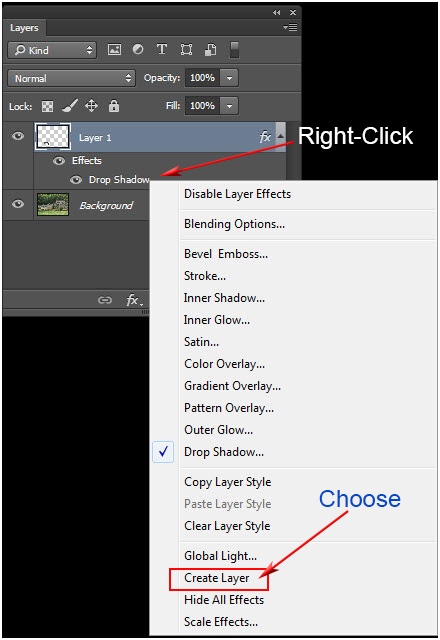
With the image/shadow layer (Layer 1 in our example) active, right-click the mouse and from the frop-down menu choose'Create Layer'

A note to the observant: Yes the 'thumbnail' image is different. This 'screen-grab' is from Photoshop CC. The styling has changed and the 'thumbnail' is from from a later demonstration. However the workflow is correct.


For older Versions of Photoshop:
With the image/shadow layer (Layer 1 in our example) active
Go to:
Layers > Layer Style > Create Layer (see below)

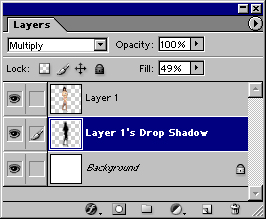
When clicking 'Yes' to 'Create Layer', the 'shadow' is presented upon its own layer together with a title identifying it as such.
The shadow transparency is also copied (shown in the 'Fill box above in P'shop V7, in previous versions the 'Opacity' shows the amount)
 
 
To continue with whichever version of Photoshop you have ..................
 

Transform the Shadow
With the 'shadow' available now as an 'image' we can get to work on it with the 'Transform' menu.
Do this via Edit > Transform and choose one of the pre-set Transformation states' or 'Free Transform' whichever is your preference
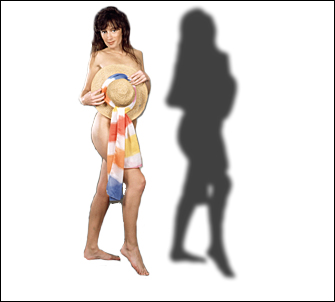
Left: The 'separated shadow'
 
The shadow can now be manipulated to suit.
The image below may have an unlikely shadow but as example it will serve.

What follows is a description about how the shadow above was created.
Having separated the shadow as described above; then, via Edit > 'Transform', using 'Rotate', 'Skew' and 'Distort' the shape was finally achieved.
 

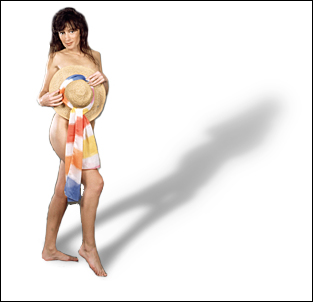
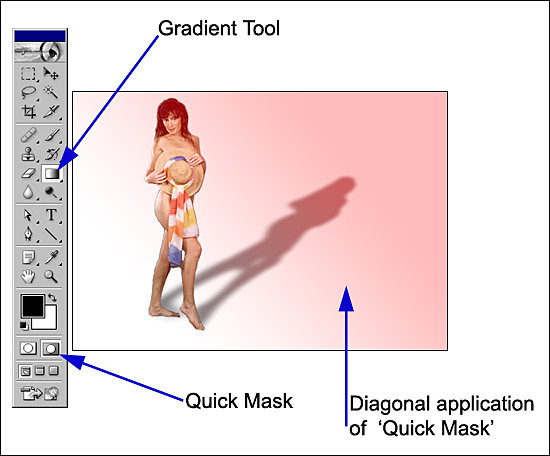
Next: the shadow needed to be gradually more blurred as it extended away from the subject

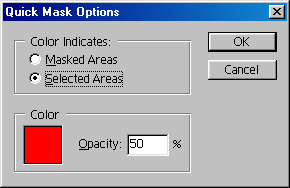
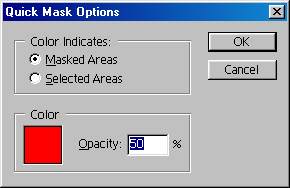
One way to achieve this is by applying a 'Gradient' to a Layer Mask, however, we'll take another route - this time via 'Quick Mask'.

Left: The Quick Mask icon near the base of the Tool Bar
Activate 'Quick Mask' and select a Linear Gradient set for black/white
It's a personal choice whether or you you prefer to use Quick Mask set to 'Masked Areas' or 'Selected Areas', whichever way around your Quick Mask 'option' is set, you can either swap it (see below), or, after 'selection' simply 'Inverse' (Ctrl + Shift + I) the selection to work on the area the way around you need it.
 
To access the Quick mask Options box (below) - double click on the Quick Mask r.h. icon
Note: Photoshop defaults to 'Masked Areas' - you may wish to change this.

Above: Quick Mask will indicated the 'Selected Area' (used below)
Above: Quick Mask will indicated the 'Masked (protected) Area'
With the Shadow Layer active, drag the Gradient across the area in the same direction as the shadow, this has the effect of producing a gradually feathered selection across the shadow .
Exit Quick Mask and the selection will be visible as 'marching ants' (the mid-point of the 'feather' is indicated ).
As mentioned above, it's around the wrong way, 'Inverse' the selection (Ctr + Shift + I).
Tip: Should you wish to alter the feathering, Ctrl + Alt + D will show the 'Feather Radius' dialogue box.
Above: Exiting Quick Mask reveals the area to be worked upon - in the image above, this will be area within the 'marching ants'
Click on the link below to continue
Next
Previous Page

'Delving Deeper into Layers' Topics
Layer-to-Layer Cloning
Adjustment Layers
Clipping Groups
Layer Masks
Layer Styles and Effects
The Text / Typing Layer (information being prepared)
Moving / Copying an Adjustment Layer to Another Image
Know-How Contents
Homepage
e-mail CRHfoto