Toning
with
'Colorize'
Clive R. Haynes FRPS
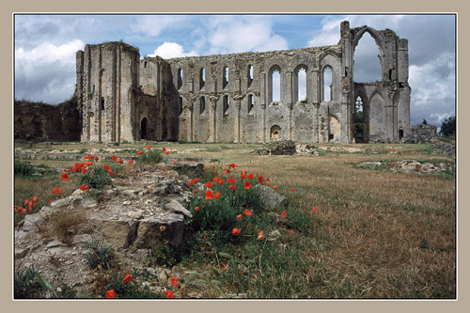
By choosing the 'Colorize' route, we can tone either
colour or monochrome (black & white) images.
For 'Colorizing' we need to work in RGB so if it's a colour file already,
no problem. However if you wish to tone a monochrome image, you will need
to either scan as RGB or change the mode from Grayscale to RGB.
(Do this via Image > Mode > RGB Color).
Either all or part of the image may be Colorized (toned) in this way. To Colorize part of the image use either a selection to define the area or for the more advanced, go via the Adjustment Layer route.
It's often preferable to create copy of the original image onto a new layer as this will preserve the original (as a 'background') should you so wish and allow subtle blending between the two layers by layer masking or blending modes. But you don't have to.
One is via, Image > Adjust > Hue/Saturation
The other is by creating an 'Adjustment Layer
The more flexible option is via an 'Adjustment Layer' (for more information about 'Adjustment Layers' go to 'Delving Deeper into Layers')
whichever route is selected the Hue & Saturation dialogue box opens
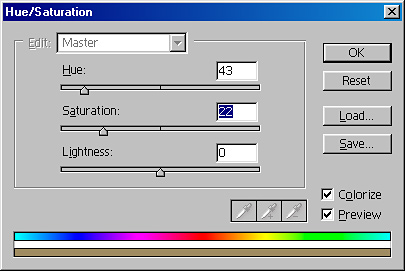
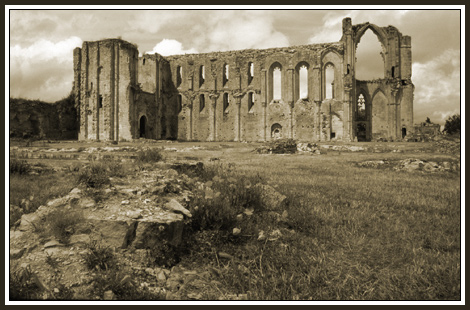
In the example above, Hue around 43 and Saturation around 22 gives a sepia-like tone.
It's unlikely that you'll need to adjust the 'Lightness' slider so leave it alone
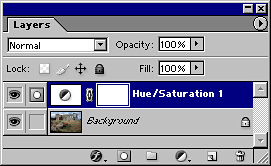
If you create an
Adjustment Layer, it will sit above the Background (or whatever
lower layer(s) you have) and be available for further adjustment by
double-clicking on the half black/white layer thumbnail rectangle.
Should you wish to erase or partially erase a section of the tone, first
ensure that the Hue/Sat adjustment layer is 'active', then with black
as the foreground colour and using a suitable brush, 'paint' on the
image and the tone will be stripped away. To restore, swap the foreground
colour to white.
Should you wish to reduce the overall intensity of the Colorize layer over the (perhaps colour) original beneath, reduce the layer opacity for this layer.