Layer Masks continued.....

Clive R. Haynes FRPS

Want to see what you have done or what remains to mask?

There are three ways of viewing the extent of the Layer Mask area.

One is to turn off the Layer(s) beneath and look at the layer with an empty background. Here you can soon mop up any stray areas, then switch the Layer(s) on again. See below

 
A second way is by holding down the 'Alt' key and clicking in the Layer Mask thumbnail - the mask area is revealed as a black & white outline. You can continue to 'paint' on this outline to refine detail and remove unwanted areas. To return to the image, 'Alt' + click again on the Layer Mask thumbnail. See below
 
The third way (and this is my favourite) is by pressing the \ (backslash) key (to the left of 'Z') - this reveals the masking you've done as a red opaque - rather like Quick Mask. You may continue painting on the Layer Mask with the red opaque visible if you wish. To switch the red off, press \ (backslash) key again. See below
 
Above: The final image

Making a selective Layer Mask

Should you wish to work on a specific area within the mask and not stray beyond, you can do this by simply making a selection around the required area ('inverse' it if you wish) and work away - painting on the mask will stop at the selection edge.


Want to Paint on the mask in dead straight lines?

Hold the Shift key down either before or after positioning the brush on the image.


'Hide All'

This is the other Layer Mask option. When you choose 'Hide All' (as opposed to Reveal All) the image 'disappears'. The Layer Mask rectangle is filled in with black. The image is be revealed by painting with white. To hide again - paint with black. It all depends on how you need to integrate the image on the layer concerned.

The quick way of opting for the 'Hide All' Layer Mask, is to hold down the 'Alt' key when clicking on the Layer Mask icon.


Using a Layer Mask with an 'Adjustment Layer'

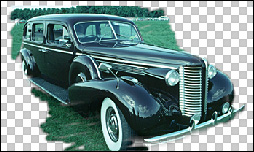
One of the wonderful things about a Layer Mask is that it automatically appears when you create an 'Adjustment 
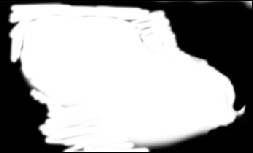
Layer'. The right-hand box on the Adjustment Layer is the Layer Mask 'thumbnail'. 
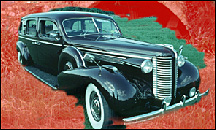
When the Adjustment Layer is activated (the layer goes blue). Black paint will paint out the Layer Mask effect and white paint will restore it. Of course different brush pressures and opacities will cause the effect of 'painting' to be greater or lesser.

For more about 'Adjustment Layers' - click on the link at the base of this page.

Note: If you have created an Adjustment Layer after first 'selecting' an area, then painting with black / white will extend or erase the extent of the area initially selected - this is really useful! Try it.


Gradient Mask
This technique enables a smooth transition from one image to another, go to Gradient Mask (click on the link)

'Delving Deeper into Layers' Topics
Layer-to-Layer Cloning
Adjustment Layers
Clipping Groups
Layer Masks
Layer Styles and Effects
The Text / Typing Layer (information being prepared)
Moving / Copying an Adjustment Layer to Another Image
RELATED TOPICS
Gradient mask
Scanning-in to Correct Scale
Getting to Grips with Layers
Delving Deeper into Layers
Manipulation - Basic Techniques
Know-How Contents
Homepage
e-mail CRHfoto