Sharpening
is frequently essential, however it can cause a variety of problems.
Sometimes
the sharpening is simply overdone and the image appears unnatural by virtue of
its over sharp definition. At other times the sharpening process also enhances
(sharpens) unwanted areas and sections such as 'noise', 'film grain' and skin
texture (exaggerating blemishes and being generally unflattering).
Something can be done to 'fine tune' our sharpening technique by applying sharpening to the 'edges' of objects and areas rather as a 'blanket' to the whole image.
Described
below is a method that will enable you to control how much sharpening you apply
and address principally 'edges'.
We'll be using the 'Find Edges' filter in
combination with the 'Unsharp Mask' filter.
The Method
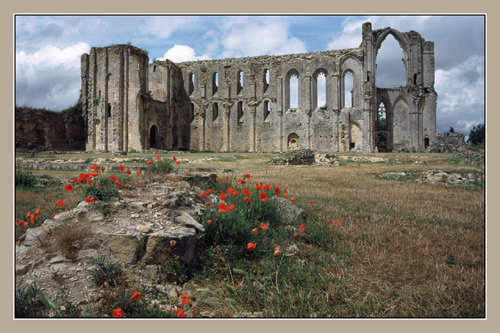
Open the picture as a Background Layer
Make a copy of this layer, placing it on the layer above
Click
on the Adjustment Layer icon.....![]() .....
at the bottom of the Layers Palette and from the drop-down Adjustment Layer menu
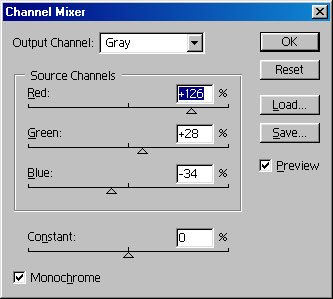
choose Channel Mixer.
.....
at the bottom of the Layers Palette and from the drop-down Adjustment Layer menu
choose Channel Mixer.
In the Channel Mixer dialogue box, click 'Monochrome'
Adjust
contrast to suit the image by the Red, Green and Blue 'sliders'. When you're happy,
click 'OK'.
Don't forget - this is an Adjustment Layer so when you wish,
you may return to it again to refine the adjustment made
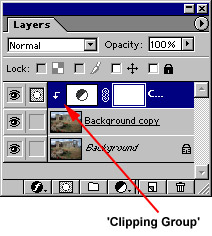
Make the Channel Mixer as a 'Clipping Group' with the layer beneath
(do this by holding down the Alt key whilst passing the cursor between the two layers in the Layers Palette, when you see the two overlapping circles appear, left (or right) click and the upper and lower layers will be 'clipped' together. This is represented by a downward arrow shown in the upper layer. NB If this is not done, the Channel Mixer setting will affect all layers beneath and not just the one you wish to alter).
Activate the copy layer
Go to Filter > Stylise > Find Edges
Filter > Gaussian Blur > 1 to 2 pixels
Image > Adjust > Invert to make a 'negative' version. (Quick Key: Ctrl + I)

Go to the Channels Palette
Click on the 'Load Channel as a Selection' icon
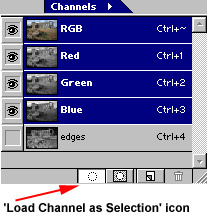
Go to the 'Select' menu - choose 'Save Selection' and name it (so you can find
it again should you need it)
Return to / activate the (original) Background layer - This is the layer to which the sharpening is going to be applied. The work on the (copy) layer above has been to 'find' the edges, separating it from the noise or grain.
Switch off (click on the eye) the upper, copy image, layer - you don't wish to 'see' it - it's done its job!
Hide the 'Marching Ants' by Ctrl + H
Go to Filter > Sharpen > Unsharp Mask > adjust to suit
That's it - only the edges will have been sharpened, leaving grain & noise unsharpened
The saved selection is available for further use.

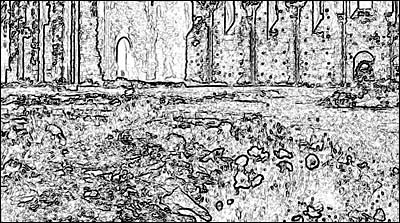
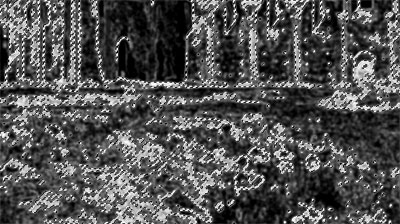
Above: Detail showing final stage - sharpening complete