Digital Infrared Photography
A Personal Workflow
Clive R. Haynes FRPS
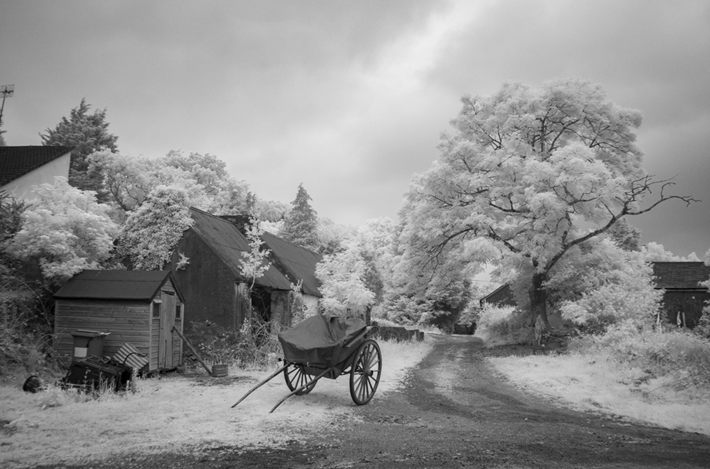
Example 2: Kerry Farmstesd. I begin by illustrating the final image.

Camera & settings:
Sony A6300 IR converted
ISO 800: 18-200mm lens at 18mm: f10 at 1/125th sec.
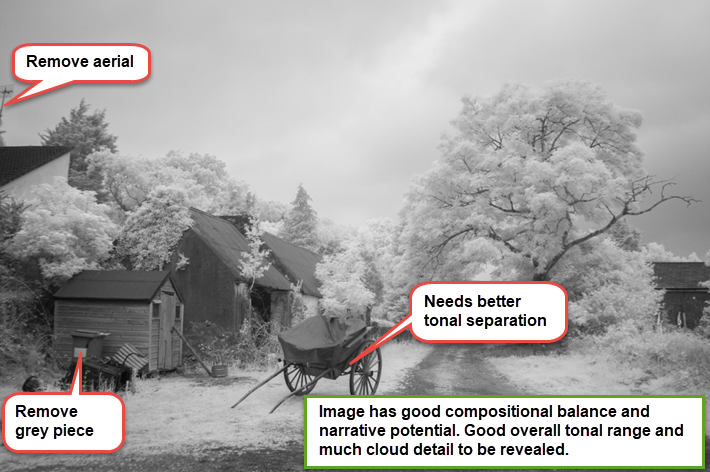
This was taken on a dull and very cloudy day after a spell of rain. I knew the scene had plenty of potential. Here was a romantic-looking Irish farmstead complete with old cart, timeworn buildings, a track to add the sense of 'journey' and a fine tree full of character. However there were some elements which needed editing, such as the TV aerial and annoying small grey rectangle by the shed.
I was also aware the image would require initial tonal control in Lightroom before using the power of Photoshop to remove the unwanted elements. This image provides a good example to show how on a dull day light can be managed within a scene to give some apparent 'sunshine' and reveal the detail of threatening clouds.
Stage 1: Lightroom
My workflow begins with the RAW file Lightroom.
In Lightroom the adjustments followed this sequence:
'Remove chromatic aberration',
Convert to B&W and remove any easy obvious spots (dust on sensor and minor objects).
Global adjustments were: Highlights reduced considerably, Sharpen to 70 with Masking at 26. Dehaze was set to +29 to add some bite to the contrast.
A Gradient Filter was placed over the sky area and Dehaze adjusted to reveal out cloud detail.