Lab Mode & False Colour using Photoshop CC
Clive
R. Haynes FRPS
Note:
If you've arrived at this page from the 'Know-How' contents list via the
'Lab Color Mode' 'link', you may wish to return to the beginning of the
section about DI IR Capture & Workflow, if so, you'll find a 'link'
at the base of this page.
Also if you are unaware or uncertain about the procedure for 'Channel-Swapping', please refer to my notes about this topic. This workflow assumes knowledge about this.
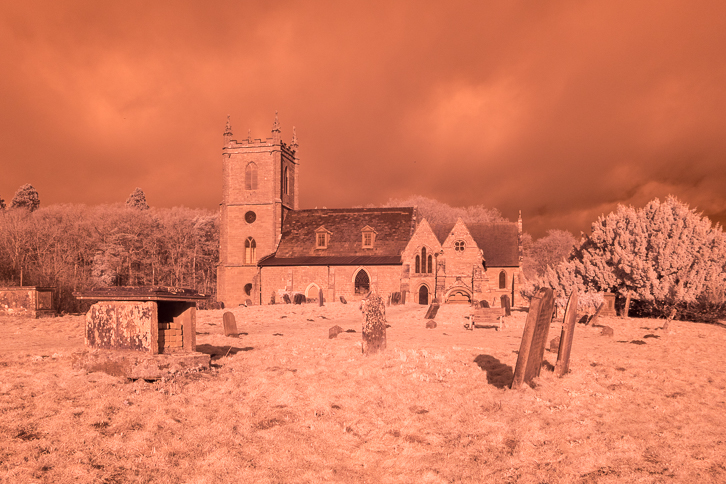
The ability to separate the 'L', 'a' and 'b' channels can offer excursions and adventures. To give an indication of the variables that one can enjoy, I'm going to use my image taken in the churchyard of St. Mary The Virgin, Hanbury (Worcestershire) as an example. Please remember that not all tonal changes will affect all images equally and that the results obtained are, understandably, referred to 'false colour', therefore the tones and colours cannot be 'wrong' - only more or less pleasing or appropriate. Within these 'pages', I can do no more than 'raise the lid' of this particular 'virtual box', courtesy of a digital Pandora.
The following example images were taken on an IR converted Sony A6300, using an in-camera pre-set Custom White Balance (very important, see previous notes about this), opened as a RAW file in Adobe Lightroom then managed via Photoshop CC.
To help with clarity and workflow, I've included screen-grabs which illustrate Histogram, Channels and Layers. There's not a 'follow this route to success workflow' for exploring the tonal opportunities in 'Lab', however, the following series of worked examples will help both to point the way and to provide an introduction.
Please remember that the results will be image dependent and the examples illustrated here may not replicate with your chosen image.
(Note: 'quick key' / 'short-cut' references in brackets, apply to a PC - my apologies to Mac users but I'm more familiar with a PC)
The starting point is the image shown below.
Open the RAW image and progress through 'Channel-Swapping' retaining the colour image. Therefore, don't continue to make the image black & white.

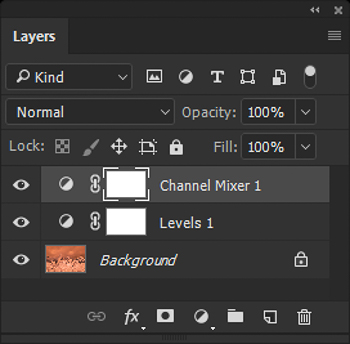
Above: Layers Palette after Channel-Swapping
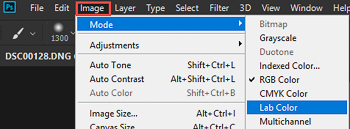
The first thing we are going to do is change the Image Mode from RGB Color to Lab Color.
Go to the top menu bar.
L = Lightness Channel (all greyscale tonal structural information)
'a' = Magenta/Green colour range information
'b' = Blue/Yellow colour range information
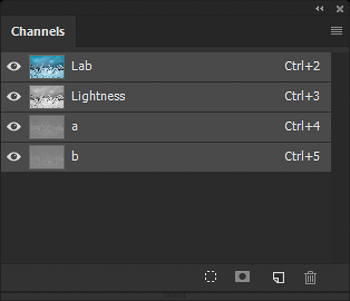
Make sure that you can see the Channels palette,as below. If it's not visible, go to Windows > Channels.
Take a look at the Channels Palette to give you an idea about what's happening. You will see there are four elements represented by small 'thumbnails'. The composite Lab representation, the Lightness (monochrome) Channel, the 'a' Channel and the 'b' Channel. It's the 'a' and 'b' Channels that we are going to exploit to reveal colour within the file.
To continue, click the link below: