Curves
Clive R. Haynes FRPS
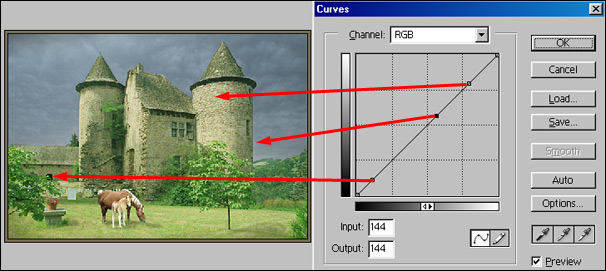
It's possible to sample areas of the image and find where they fit on the curve.
When the curves dialogue box is open, simply take the cursor into the image and as you move it, the points of tone the cursor encounters will 'travel' up and down the curve.
Should you wish to 'anchor' certain points of tone for treatment, hold down the Ctrl key and click. The point will then 'stick' to the curve. And you can have multiple 'points' by this method.
In the image below, the arrows indicate where each point was 'sampled'.

The sampling of points along the curve has a practical application as by this method, specific areas of tone may be identified and treated accordingly.
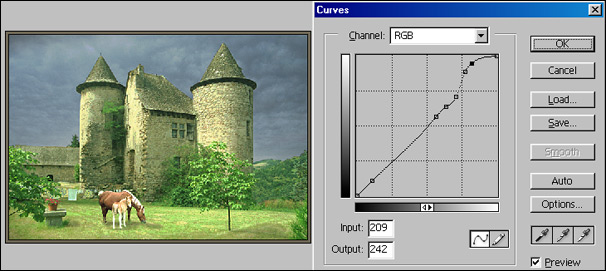
Taking the upper point on the image above, let's see what happens if we modify specifically targeted area of the 'Curve'.

To prevent the other (lower) areas of the curve from becoming distorted, two lower anchor points were positioned to 'hold the shape'.
Setting points
with the Eyedroppers
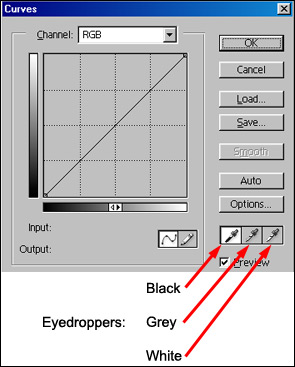
The three eyedropper icons in the 'Curves' dialogue box allow us to set
the black point and white point whilst the Grey eyedropper
is for setting a neutral tone of grey (refer to the section on 'Colour
Cast' to explore this option - it deals with the 'Grey Eyedropper' when
using 'Levels' as the method of adjustment but the same logic can be applied
to 'Curves'). See link below.
To use the eyedropper, simply click on the one you need, then take the cursor into the image and click on the point you wish to set as absolute black and/or peak white. You'll see no change in the curve itself if starting from a 'straight line' unless the Curves 'Channel' is changed from RGB to Red, Green or Blue.
