
| Channel
Mixer |
| Clive
R. Haynes FRPS |
| Welcome to this page. You may have progressed from the previous page or arrived by a direct-link route - whatever. We get down to the business of using Channel Mixer. With an understanding of the basic concept of Channel Mixer, let's take a look at how we can make changes to an image to both improve its appearance as a monochrome study and to 'enhance' it as a colour version. Making the Monochrome Image By selecting areas of specific tonality we can make alterations to contrast and by so doing the emphasis and relative compositional value of areas of an image. Using Channel Mixer enables us to target different areas of the image and adjust their monochrome content. Try this simple exercise with an image such as this comprising largely of landscape and sky. Open your image as the 'Background' (bottom) layer |
| Below:
the Opening Image |
| |
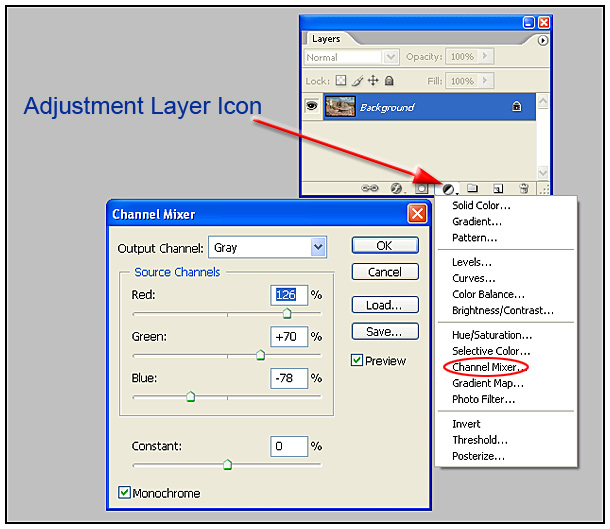
| In the Layers Palette choose > Adjustment Layer (black & white bisected circle at base) > Channel Mixer Tick the Monochrome box Adjust the three, slider controls to enhance the contrast of the sky area. You'll notice from the dialogue box below that I've been fairly aggressive with the Red& Blue sliders - pushing the Red to 126 and reducing Blue to -78. This is to increase the contrast in the sky. I'm not worried about the impact on the remainder of the image. Click OK |
|
|
 |
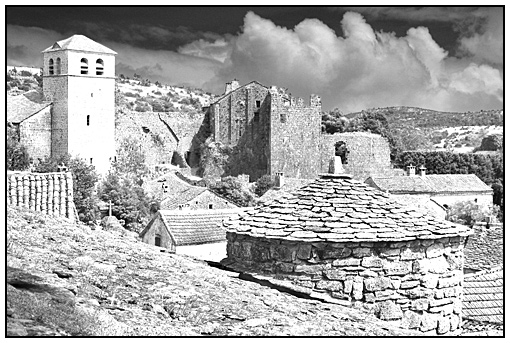
Below:
The Monochrome Result after Initial Adjustment. The sky tones are as required but more work is required for the middle-distance and foreground |
 |
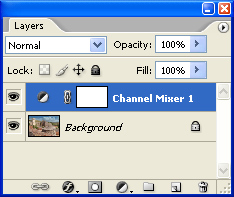
| Note that the Layers Palette now has an adjustment layer - that of 'Channel Mixer'. As with all adjustment layers, it has an associated 'mask thumbnail' (the right hand white rectangle). See below. |
 |
| The next step is to work on the mid-distance & foreground areas - to proceed, click the 'Next' link below |