Above:
Before 'Channel Mixing' - the straight shot
Above:
Channel Mixer Mono
Above:
After 'Channel Mixing' and colour blending
-
a more artistic and interpretive version
| Channel
Mixer |
| Clive
R. Haynes FRPS |
| 'Channel Mixer' is frequently regarded as one of the more mysterious aspects of Photoshop. The purpose of the following information is to demystify the operation of this facility and to illustrate how user-friendly it can be. It will also serve to show how an image can be substantially altered with judicious application of 'channels' adjustments. To illustrate the workings of 'Channel mixer' I have selected one of my images that will respond to the changes I intend. Working on your own image, or if you wish, down-loading a larger file version of the opening picture below and following the step-by-step information that follows, should give you a good foundation in operation of 'Channel Mixer'. |
| Below:
The original & two versions of the image |
| |
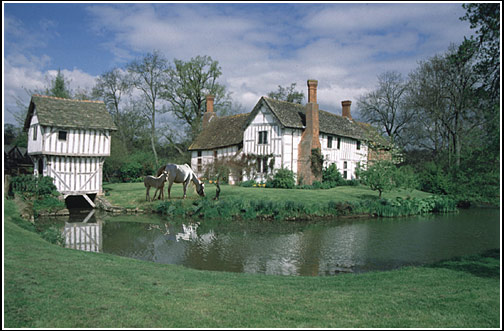
| Above:
Before 'Channel Mixing' - the straight shot |
|
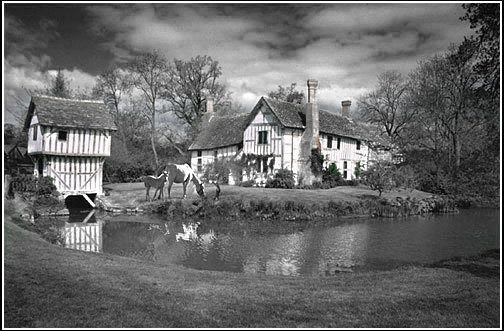
Above:
Channel Mixer Mono |
| |
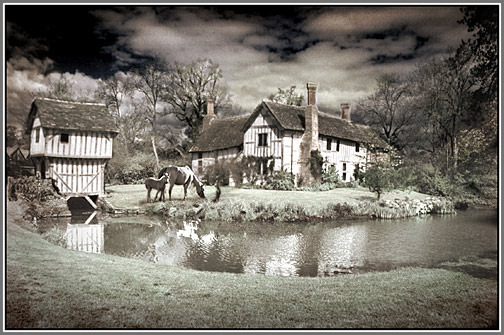
| Above:
After 'Channel Mixing' and colour blending |
| To
download a large-file version of the opening image, click here........ |
| Open the image and create an Adjustment Layer - choosing 'Channel Mixer' from the drop-down menu. Tick
the Monochrome box and the image becomes black & White. |
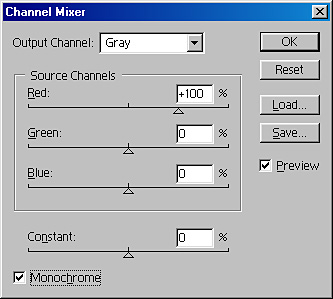 |
| Above:
Channel Mixer dialogue box - opening settings |
| Monochrome
workers are familiar with the concept and practice of using colour filters attached
to the camera lens when exposing B&W film. The filters (usually either yellow,
orange, red, green or blue) influence the way in which colour is recorded on panchromatic
film. The filters are used to increase contrast or to give greater tonal separation
to areas of the scene. For example, a red filter will dramatically darken a blue
sky whilst a green filter will lighten foliage. Using Photoshop one can, in fact, dispense with shooting B&W and record everything as a colour file, making any colour filter decisions later. All sorts of colour combinations are possible, going way beyond the usual range colour filters listed above and one may combine several 'colour filters' in one image - finely adjusting tonality through different colour filtrations and intensities! To
get the feeling for the power of Channel Mixer, begin by altering the values of
the sliders and note the changes that can be effected. To begin return red to
zero and advance green to 100 (or more). It has been said that one should adjust the sliders so that the total value equals 100, however, in practice this need not be the case - simply adjust the values until a pleasing image is obtained. As you can readily appreciate, different combinations of R, G and B sliders will give different filter effects. Changing the value of the 'Constant' slider will cause the image to darken or lighten globally. The 'Next' link below takes you to a page where you may continue your 'Channel Mixer Adventure' |