Make a 'Zwirl'
Continued
Clive R. Haynes FRPS
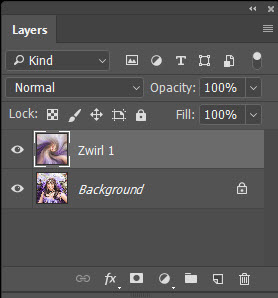
Make a copy of the starting image which is usually the Background Layer (The quick way is to drag the Background Layer onto the New L&ayer icon, next to the Trash Bin).
With Copy 1 Layer active, name it 'Zwirl 1'
Go to Filter > Blur > Radial Blur > Zoom 100.
Quality: 'Best'.
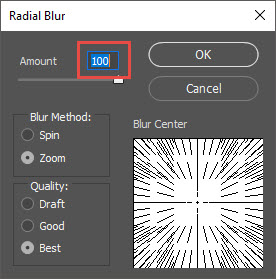
Repeat Radial Blur as above to include zoom 100, etc, however it's faster to use the 'Quick Key' Ctrl+F (or in later Photoshop versions, Ctr+Alt+F) which will redo the filter settings last used.
Having applied 'Radial Blur' twice, Select All (Ctrl+A) then Edit > Copy (Ctrl+C) to copy this image. It will be used shortly.
Ctrl+D to Deselect.
Continue with Zwirl 1
Add another type of Filter: Go to: Filter > Distort > Twirl
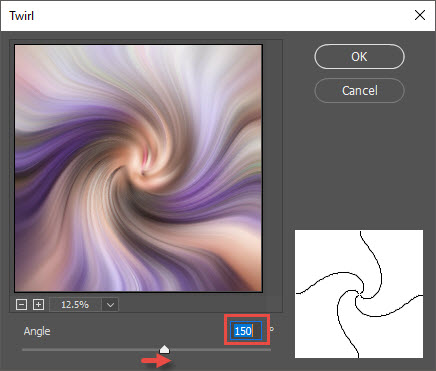
Set the Angle to +150 (it will show as 150) by adjusting the slider or typing the value in. Click OK to confirm.
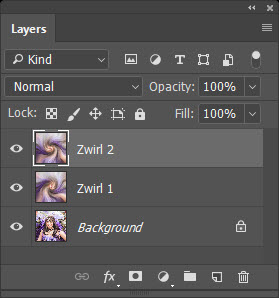
Edit > Paste (Ctrl+V) the copy made a few moments ago, it appears on new layer above 'Zwirl 1'
Rename this Layer 'Zwirl 2'.
Go to Filter > Distort > Twirl
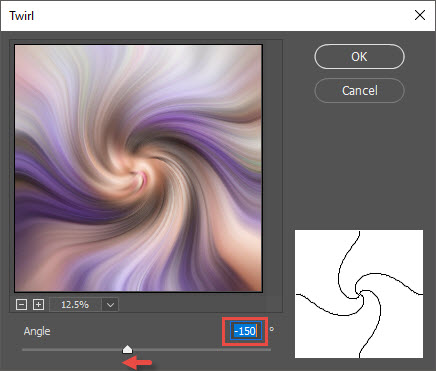
Go to Filter > Distort > Twirl
This time set the Angle to -150 note: it's important this is minus 150