Polar Coordinates
Rotary Distortion
Clive R. Haynes FRPS
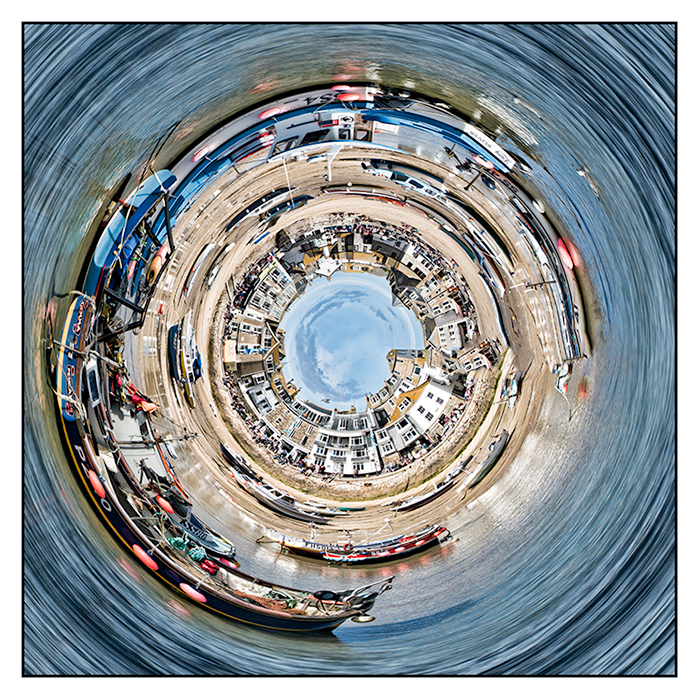
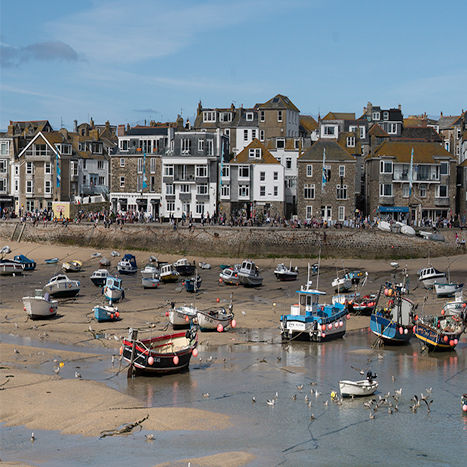
Very different and imaginative images can be produced by the Polar Coordinates Filter.
A good deal of experiment is required to find images that work. However the technique is rewarding and all sorts of subjects work from figurative to abstract. This is what you do:
For an orb-like (circular) result the image needs to be square. Either choose a square image, crop to a square or squash a full image to make a square (don't be concerned as it's going to be stretch distorted anyway).
Taking the 'squash to square route' as an example, this is what you do.
NB: If you're starting with a square image then skip to Making the Distortion
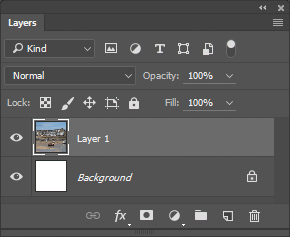
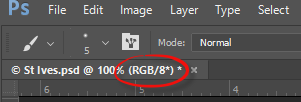
For your chosen image and note the bit depth. Look at the image tab (just below the options bar) for 8 or 16(bit) See below
Check the dimensions of the image by Image > Image Size (Ctr+Alt+I).
Make a note of the shortest side of your image (i.e. height for a landscape format / width for a vertical).
Also, make a note of the Resolution.
Create a New Document by File > New (Ctrl+N) and set the height and width to the shortest side of your image you've just noted.
Choose a white background and set the bit depth to match the original
Resolution: Set either to your original or the required amount (avoid going higher to avoid resampling). However, if you're making a print, don't fall below 200ppi.
Once you're set, click 'OK' and the new, square, white document appears.
Go to your image
Select > All (Ctrl+A)
Edit > Copy (Ctrl+C)
Go to the New Document
Edit> Paste (Ctrl+V) and a new Layer appears (See below)