Magic Wand Tool
The Magic Wand is a useful tool for rapidly selecting areas of same or similar tone.
Move the cursor into the required area and click - 'marching ants' appear to define the boundaries.
See screen - grab below:
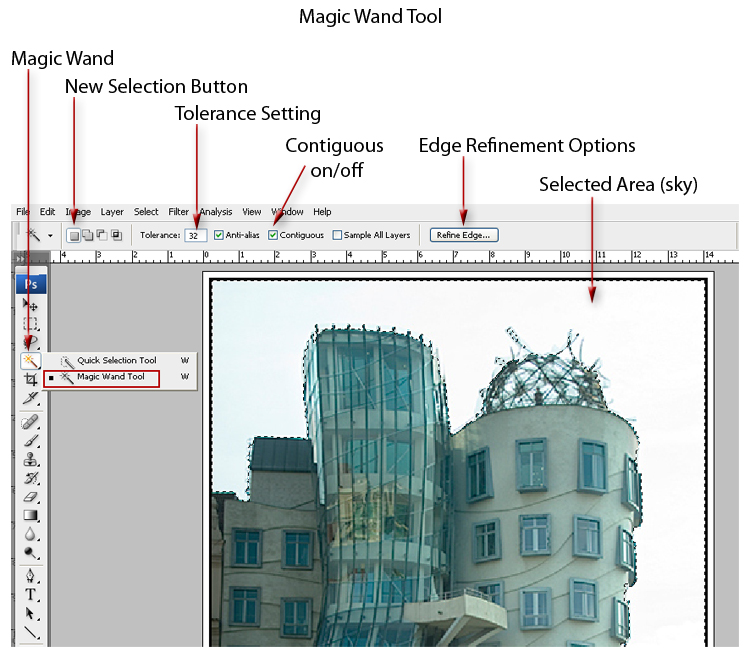
Tolerance Setting:
This figure defines the range of contrast sensitivity the tool will 'look
at', taking the click point position you make in the image as the reference
starting point. This point is a pixel or group of pixels. Strangely, the
choice for whether it's a single pixel or a group is not a setting on
this options bar. You need to go to the Eyedropper Tool, and set the 'Sample
Size' from that tool.
The Eyedropper Sample Size will then be the new default setting for the Magic Wand. This, to me, is an anomaly within Photoshop and quite strange. However, it's the way it works.
Raising and lowering the tolerance setting will include or exclude similar and / or near toned pixels. In this way the tool will either 'grab' more or less.
Contiguous: on-off
(via tick-box):
This setting determines whether the limit of the Magic Wand 'grab' is
set by the boundary of the last pixel tone that 'connects' to its similar
(within tolerance) adjacent neighbour (contiguous), or whether the 'grab'
finds all similar tones within the image area (non-contiguous).
It depends what you need as a result.
Making more complex 'Selections' Refining and modifying the selected area and using 'Quick Mask'