| The three techniques
that follow alter the appearance of the pen & ink effect, all add colour back
into the image by different means which are:
'Blending' by changing the 'Blend
Mode' of the Pen & Ink layer,
'Blurring' by blurring the 'Background'
layer
'Colour Blending' by choosing a suitable colour blend mode for a copy
of the 'Background' (original) layer The
various techniques described can be intermixed and other possibilities experimented
with Layer masks
may be added to erase and expose different parts and stages of the image |
| NB: All the
techniques that follow take their starting point as being the final image and
layer arrangement as described on the final page of the Pen & Ink Technique
(i.e. the page before this one) with the layers arranged as below |
| |
| Blending
the 'Pen & Ink' layer |
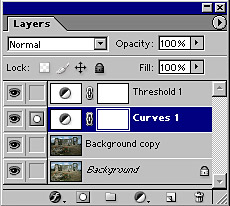 The starting Point
 |
| |
|
Merge the 'Threshold', 'Curves' and Background copy layers by switching off the
eye icon on the Background (bottom) layer and make the 'Background Copy' the active
layer. |
| Next... |
| Activate the uppermost
layer then go to Layers > Merge Visible |
|
Switch the Background
layer ('eye') back on again
Return to the newly merged layer (above) |
|
| Scroll through the
Blend Modes for this layer and observe the different results |
|
| A quick way of scrolling
through layer blend modes is to activate one of the top four tools in the Tool
Box, then hold down the Shift key and by pressing Plus (+) or Minus (-) on the
keyboard top row (not the numeric pad), the blending modes can be scrolled through
one after the other. Plus goes forward, Minus goes back |
|
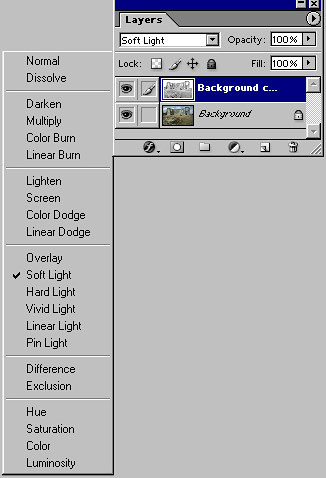 Blend Modes
 |
|
| |
| Pen
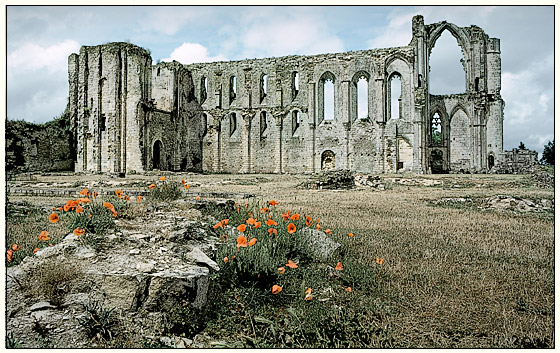
& Ink version combined with original image in 'Soft Light' blend mode |
| For
another method, click below |
| |
 The starting Point
 Blend Modes