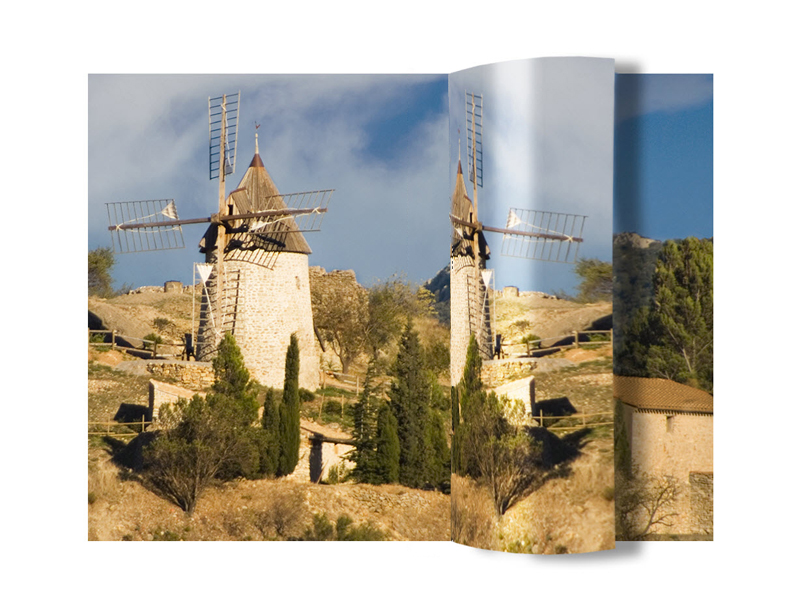
Page Curl
(Continued)
Clive R. Haynes FRPS
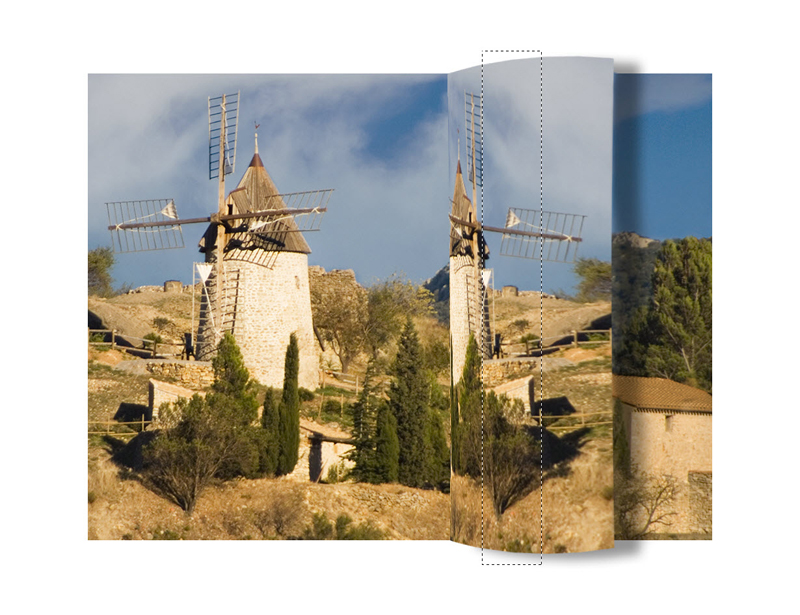
Putting a ‘Sheen’ on the ‘Curl’
To render the ‘curl’ more convincing and add some three-dimensionality, the next stage is to create a selective vertical band of lightness or ‘sheen’
Make a New Layer at the top of the Layer stack and rename as ‘Sheen’
Use the Marquee Selection Tool to create a vertical selection on the ‘curl’.
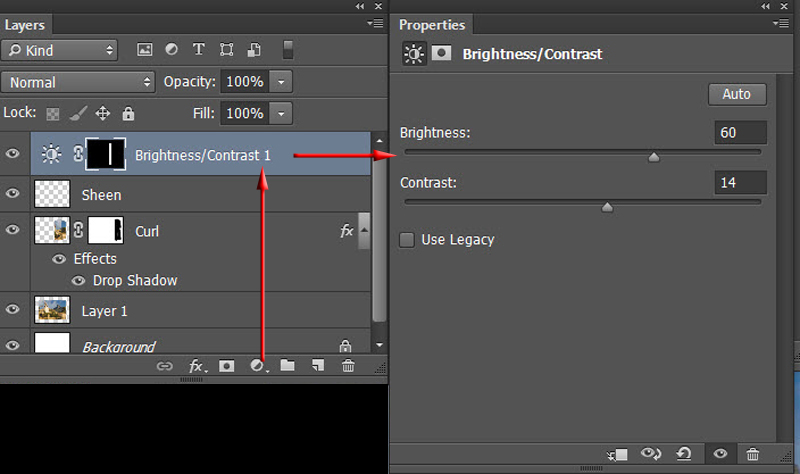
Add an Adjustment Layer, choose Brightness/Contrast (‘Levels’ or ‘Curves’ would serve equally as well) and brighten the area. I used Brightness 60 and Contrast 14. It’s an Adjustment Layer so you can revisit it
Choose the Gradient Tool set to Linear Gradient, Foreground to Transparent, 33% Opacity, Tick ‘Reverse’, ‘Dither’ and ‘Opacity’ - See ‘screen grab’ below

To blend the brightness of the ‘sheen’ choose Black as the Foreground colour and hold down the Shift Key whilst click/dragging the Gradient from the centre of the ‘Sheen’ to right and left for a few strokes until a pleasing gradual ‘sheen’ is made. Take care not to leave hard edges where the ‘sheen’ stops
Readjust the Brightness/Contrast settings (Adjustment Layer) as required