Page Curl
(Continued)
Clive R. Haynes FRPS
Making the ‘Curl’
Activate the ‘Curl’ Layer
At this stage we introduce the ‘Warp’ Transform Tool.
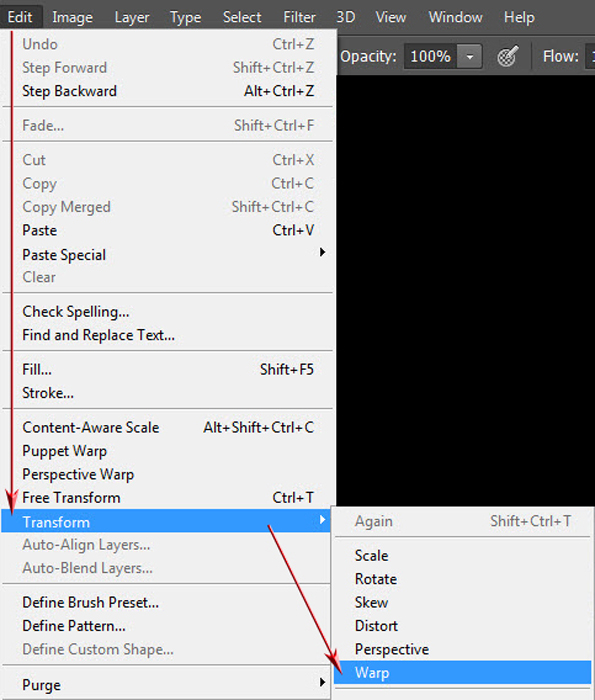
Go to Edit > Transform > Warp
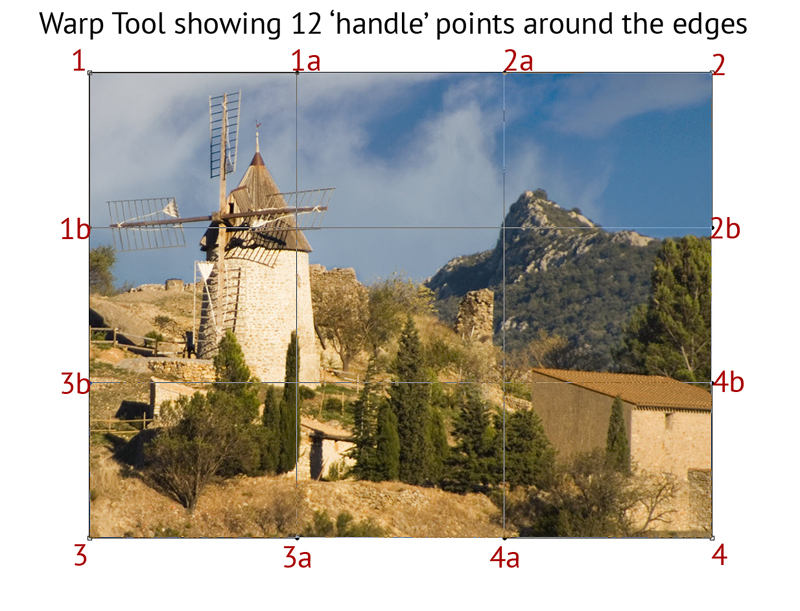
The image area will overlaid by a grid based on ‘third-points’. Although not easy to spot at this stage each corner point or ‘handle’ has two arms attached (these are rather like the Bezier Curve Handles the Pen Tool uses). The screen grab shows the positions of the ‘handles’.
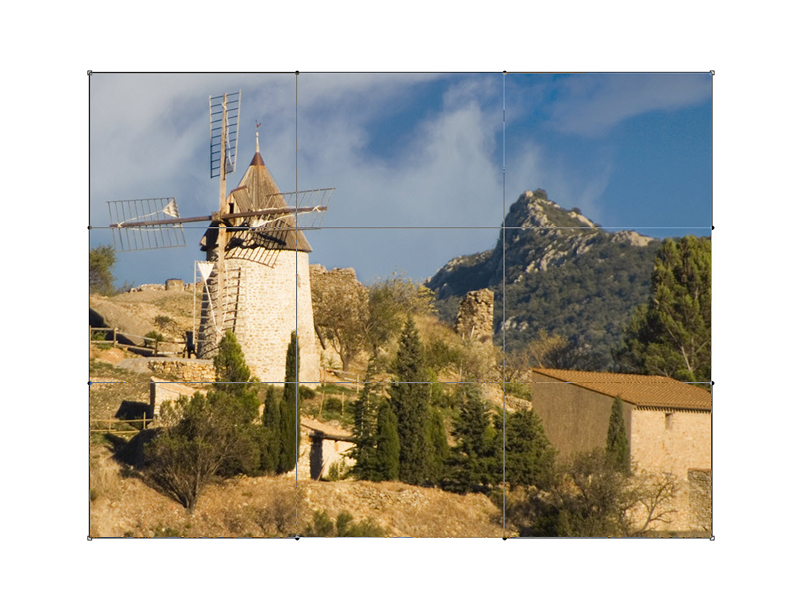
Clicking and dragging a handle will distort the image. Similarly clicking inside the edges of the image and dragging will also cause distortion. The trick is to use the ‘handles, corners and indeed anywhere within the image to achieve the warp or shape you need. It’s easier to do than to explain! Try it.
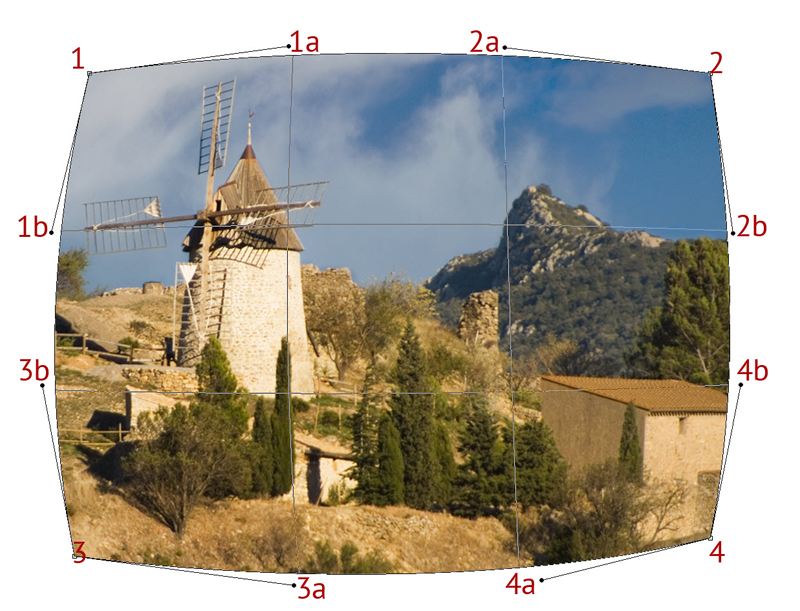
For this method, follow this route:
Begin with ‘handles’ 1 and 3 and drag the edged to just past handle positions 2a and 4a
Use the side handles 1b and 3a to drag the curved edges into a vertical alignment. Refine the alignment by dragging handles you started with, 1 and 3, and readjusting 1b and 3a until you’re satisfied. You’ll discover what to do by trial and error.
The relocated ‘handle’ positions are shown as 1/p2, 1b/p2, 3/p2 and 3b/p2
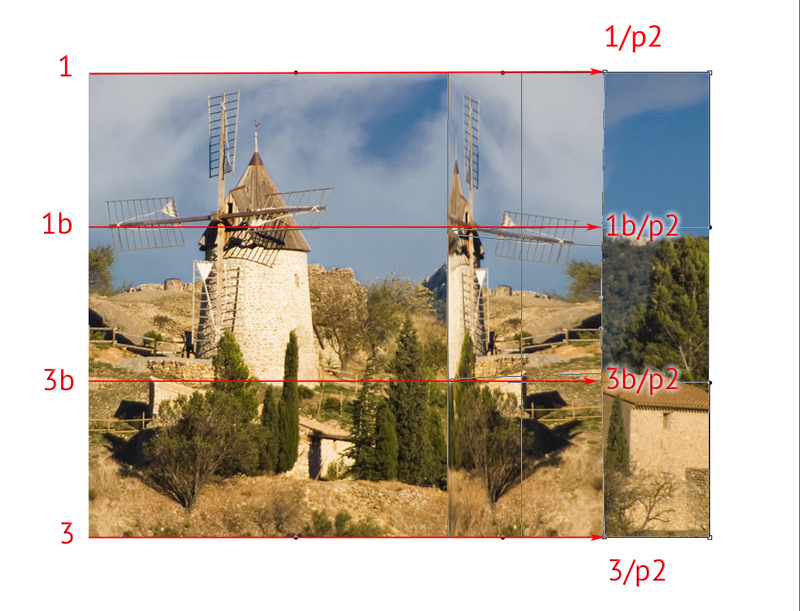
As an aid you may care to add a ‘Grid’ as this may assist alignment for. This step is optional. The ‘Grid’ can be displayed by Ctrl + @ ( US keyboard Ctrl +’ ) or by View > Show > Grid. To hide the Grid, use the same shortcut or View > Show > Grid (un-tick)
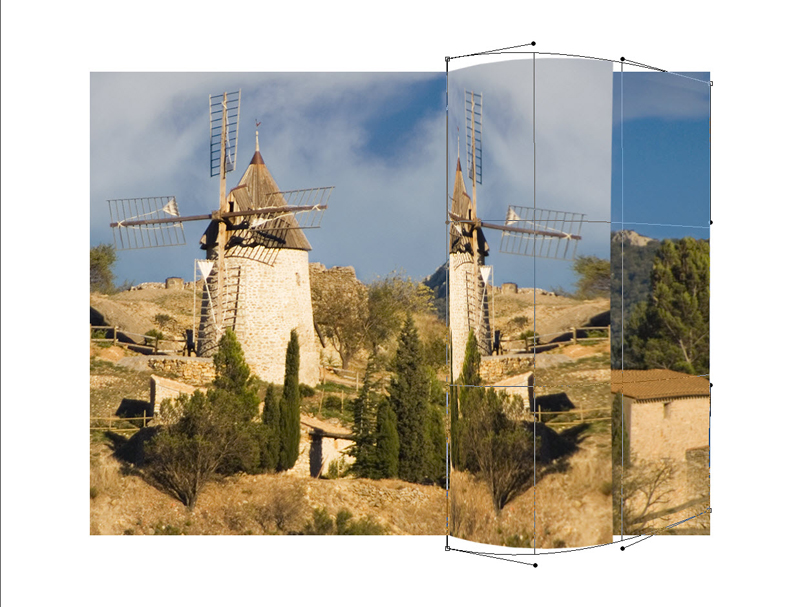
Give perspective to the page by dragging the two leading edges beyond the image top and bottom edges, then carefully click on the ‘curling edge’ for upper and lower parts and reposition to line up with top and bottom of the image. See below.
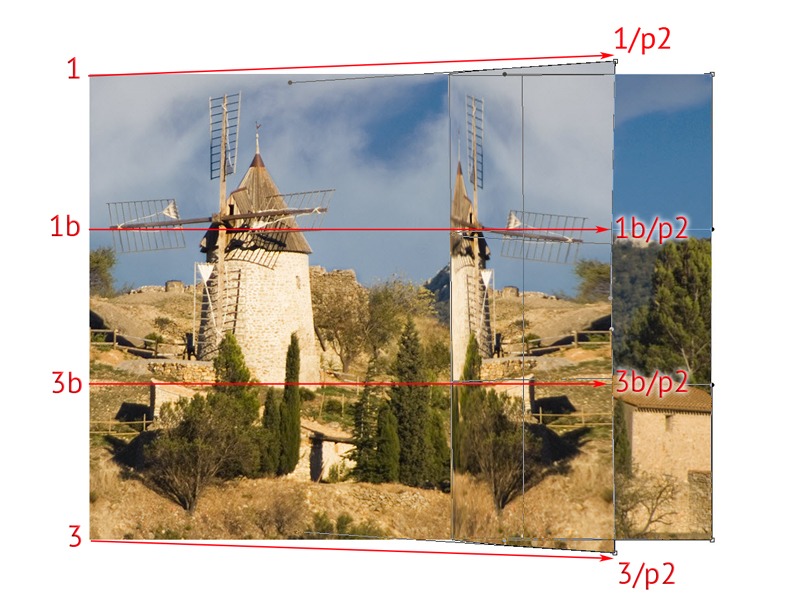
Activate the Warp Tool again and refine the ‘curl’. You’ll see a fresh Warp Grid. Use the ‘handle points’ as shown to introduce the curve which suggests a ‘curl’
