Portraiture
Digital Make-Up
Continued
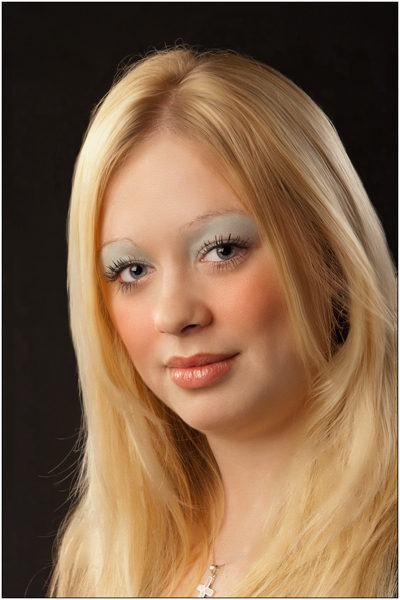
Working on the Cheeks
Clive R. Haynes FRPS
In dealing with the cheeks we can move swiftly as the method of working follows the same method as described for 'eye-shadow'.
The screen-grabs below illustrate the workflow:


soft-edge brush
Step 3: Above:
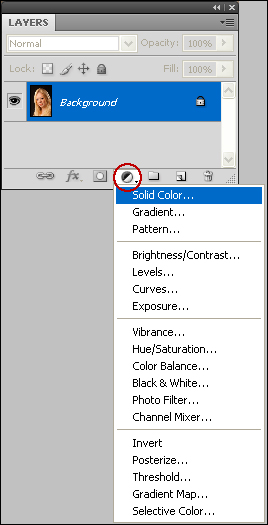
Solid Color Adjustment Layer
Hold down Alt key before clicking on Adjustment layer icon and continue
holding down to select Solid Color
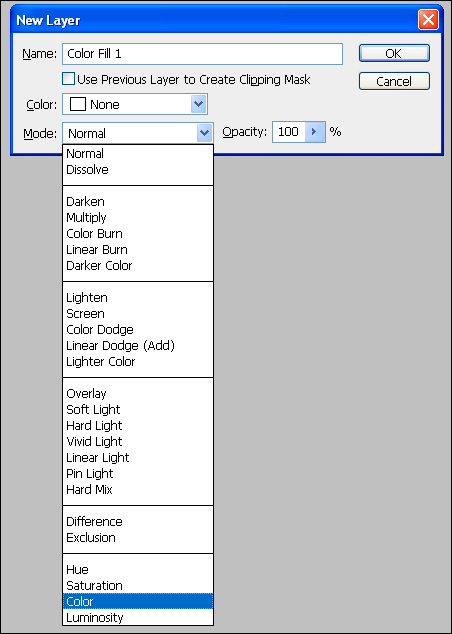
Step 4: Above: Color Fill dialogue box: Choose 'Color' as (blend) Mode.
Click 'OK'
Click 'OK'.
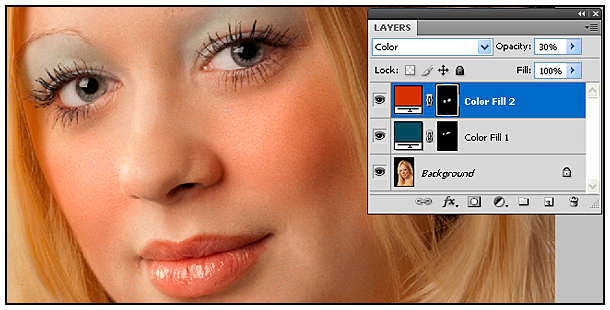
Above: The result of the steps below:
Next
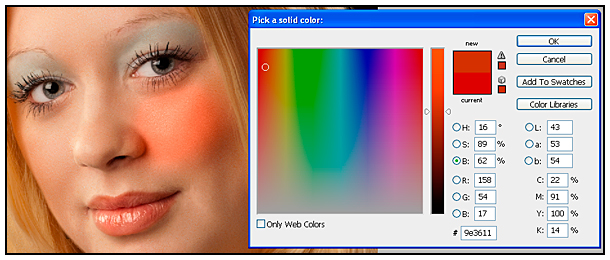
Step 7: Double-click on the Solid Color Fill 1 Adjustment Layer where the coloured rectangle appears.
The Colour-Picker box opens.
Look at the image and adjust the colour to your preference.
Click 'OK'.
.
Step 8: The other cheek.
NB:
Before
you start:
Don't forget. To use a
brush tool
in conjunction with the
mask for
the Adjustment Layer, the mask 'thumbnail' (the black rectangle to the
right of the 'link' symbol on the Color Fill Adjustment Layer) must be
active - that is to say it must display a white rectangle around it. If
it isn't active, then a 'no-go' symbol will appear as you introduce the
brush cursor into the image area. To activate the mask upon the layer,
simply click within the mask area and the white border will appear.
Choose a soft-edge brush and with white as the foreground colour, paint the eye-shadow into the area for the other cheek. Changing the opacity of the brush will alter the density (a graphic pen & tablet is particularly useful for this). If you wish to correct an error, swap to black as the foreground colour. In this way the area of eye-shadow for both eyes can be extended, reduced and refined.
In the final version, I preferred a lower setting for the Adjustment Layer, that of 26%.
Our next area of attention with be the lips, click on the link below.