Portraiture
Digital Make-Up
Continued
Clive R. Haynes FRPS
Having made a selection of the area to apply the make-up we need to choose a colour and a blend mode. There's a quick and efficient way to do this:
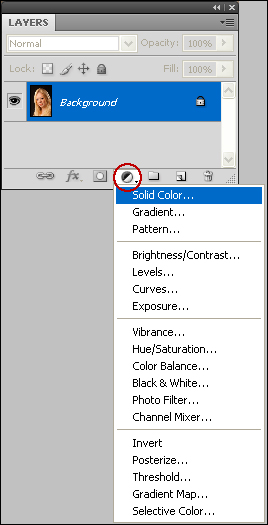
Hold down the Alt key and whilst holding it down, click on the Adjustment layer icon at the base of the layers Palette (half-black / half-white circle) continuing to hold down the Alt key, choose 'Solid Color'.
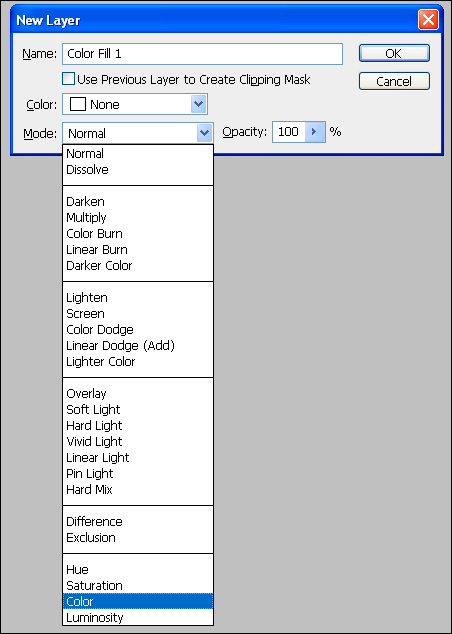
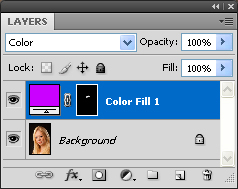
A 'New Layer' dialogue box will open, go to 'Mode' and click on the drop-down arrow and choose 'Color'.
Click 'OK'. See below:
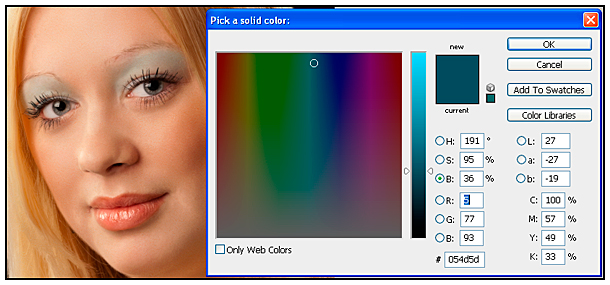
Next: In the 'Pick a Solid Color' dialogue box a decision needs to be made about the starting colour. Choose one that looks about right for a starting point. No doubt it will appear too vivid at this stage but go ahead. In fact,as to better understand this exercise, choose a bright warm tone such as violet.
NB: To better understand this exercise, I suggest you choose a bright, warm tone, such as a strong violet shade, as illustrated below.
The Colour Picker
box above shows a rainbow spectrum of colours this is because 'B' (Brightness)
is the chosen 'radio-button' (there's a dot in it).
If you prefer a different display, then activate either 'S' (Saturation)
or 'H' (Hue) and make the adjustment.
'H' (Hue) offers close fine-tuning of the tone.
Click 'OK'.
You will now see Color Fill 1 Adjustment Layer has appeared above the image layer.
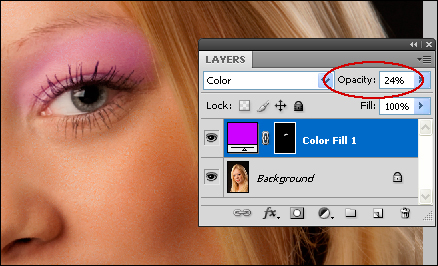
The shade of eye shadow is rather bright. To tone it down, adjust the opacity setting for the Adjustment Layer, see below:
The next step is to work on the other eye and this is very easy.
NB:
To use a
brush tool
in conjunction with the
mask for
the Adjustment Layer, the mask 'thumbnail' (the black rectangle to the
right of the 'link' symbol on the Color Fill Adjustment Layer) must be
active - that is to say it must display a white rectangle around it. If
it isn't active, then a 'no-entry' icon will appear as you introduce the
brush cursor into the image area. To activate the mask upon the layer,
simply click within the mask area and the white border will appear.
The Adjustment Layer is ready and waiting to deliver the shade chosen to anywhere in the image, all we have to do is reveal it.
Notice the small white area in the midst of all the black in Color Fill 1 Adjustment Layer. The white indicates where the mask has been removed to reveal the colour that's beneath. So all that needs to be done is to remove the mask in the appropriate area. This is simple.
Choose a soft-edge brush and with white as the foreground colour, paint the eye-shadow into the area above the other eye. Changing the opacity of the brush will alter the density (a graphic pen & tablet is particularly useful for this). If you wish to correct an error, swap to black as the foreground colour. In this way the area of eye-shadow for both eyes can be extended, reduced and refined.
We now have two eyes done.

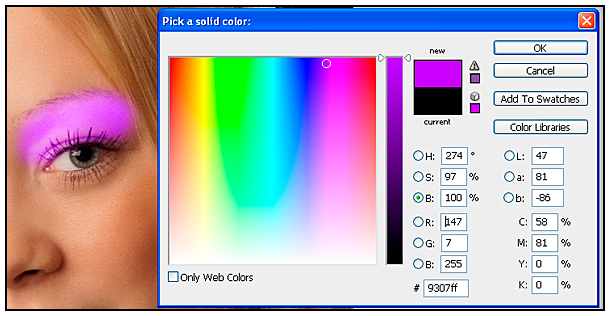
I can't say that I'm really wild about the colour for the eye-shadow. Here's the way to change it:
Double-click on the left-hand (coloured) rectangle for the Solid Color Fill 1 Adjustment Layer.
The Colour-Picker box opens.
Look at the image and adjust the colour to your preference.
Click 'OK'.