Digital Make-Up
(Older Versions of Photoshop)
Clive R. Haynes FRPS
A portrait can sometimes be enhanced by the use of make-up. Naturally the subject will have provided herself with make-up or perhaps not but occasionally there's a need to either add make-up or to change the make-up in some way.
In this 'how-to' we'll look at applying make-up for eye-shadow, a blush for the cheeks and an slight alteration to lipstick colour.
Firstly, I lay no claim to being an expert in make-up and secondly, to make the illustration more evident, I have boosted the level of make-up a little. In reality for this model I would be a little more subtle with the colour.

OK, let's make a start.
Open your image.
I'm going to begin with adding some eye-shadow.
To define the area for work, I'll make a selection using Quick-Mask
Click on the Quick-Mask
Tool Icon at the base of the Tool Bar:
![]()
For ease of working make certain that the Quick Mask Tool is in the 'Selected Areas' mode. To do this, double-click on the Quick-Mask icon and in the dialogue box, choose 'Selected Areas'.
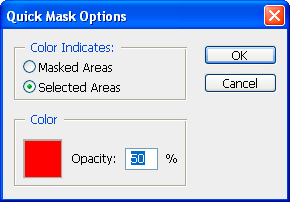
This box also allows you to swap the default colour of red to a more
convenient colour (as you might guess using a red mask colour upon a
red dress isn't very helpful) and the opacity of the mask can also be
changed here)
Click 'OK'.
Next, choose a large soft-edge brush that just fits within the area, and paint on (with black as the foreground colour) the Quick-Mask over the area for eye-shadow. It will appear as red with a good soft edge. If you wish to undo or 'unpaint' an area of mask, swap to white as the foreground colour.
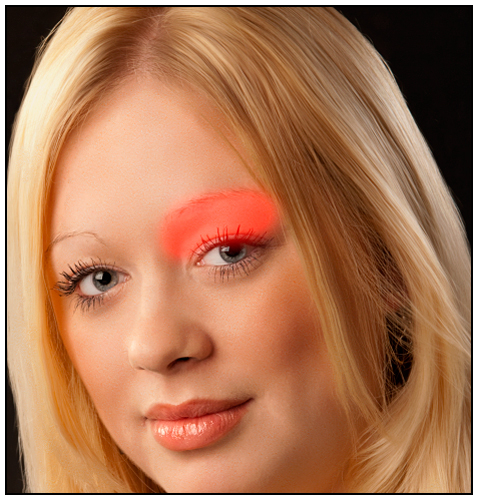
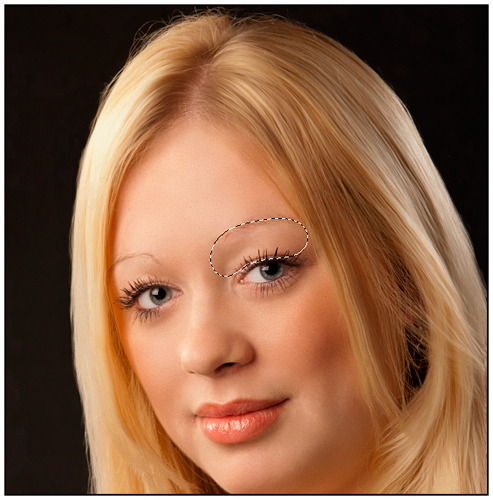
Above:
Marching Ants defining the selected area after Quick-Mask applied.
Notice that the edges of the selection will be well within the outer
limits of the soft-edge as the selection marquee only defines the area
that is greater than 50% opacity but don't worry, the soft 'feathered'
edge will be retained as you'll see in the next step.