Layers
Understanding the Basics - continued
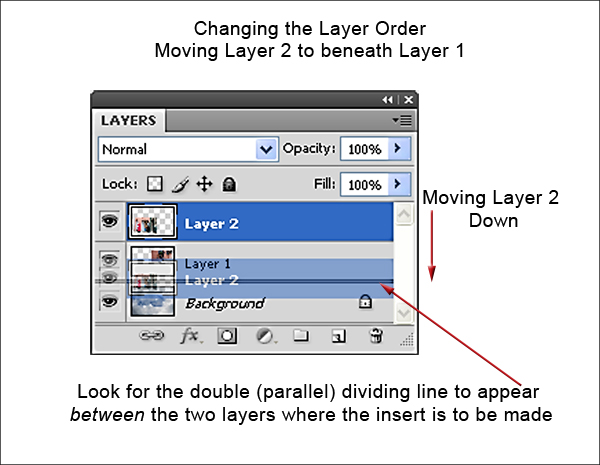
Moving a Layer to a New Position in the Stack
Clive R. Haynes FRPS
Upon opening an image, the 'thumbnail' of the picture will appear on the 'Background' Layer. Initially, the 'Background' may be considered as a layer firmly fixed and 'locked' at the bottom of the stack.
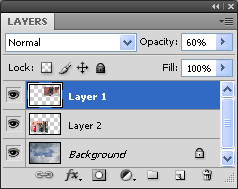
When another image is added to the layer order for instance by copying and pasting-in, it automatically appears as a new layer immediately above the layer that was 'active'. The 'Active Layer' is highlighted in blue (if required, it's possible to change this default colour). To 'activate' a particular layer, simply click on it, it will highlight in blue and all functions will be directly targeted to that layer.
Moving
a Layer to a New Position - above or below another layer
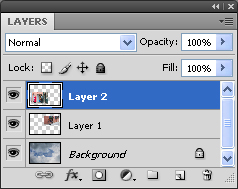
We frequently need to alter the position (or order) of the layers in the
stack. Take for example a picture comprised of three image layers: 'Background',
'Layer 1' and 'Layer 2. It's possible to swap the positions of Layers
1 and 2 to change which image is overlaps the other.
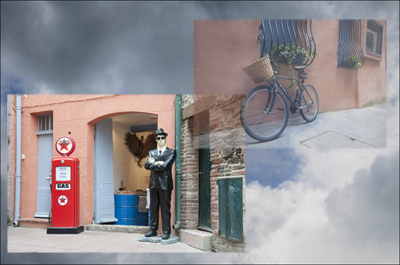
The images below illustrate the effect of swapping two image layers to change how one overlaps the other.
The third example illustrates a change in Opacity for the upper layer to partially reveal what's beneath.
Layer 2 is behind Layer 1
To move Layer 2, Click & Drag Layer 2 to the 'join' between the Background layer and layer 1
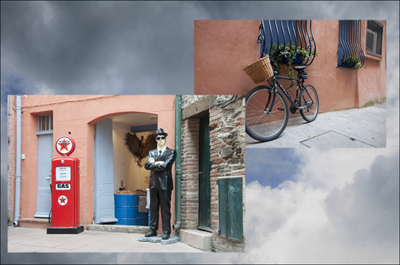
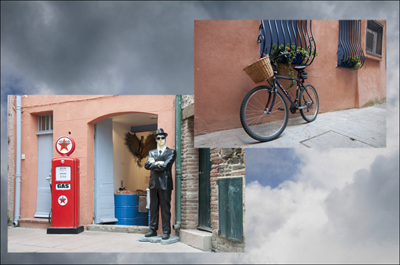

(Opacity slider control for Layer 1 has been adjusted to 60%)
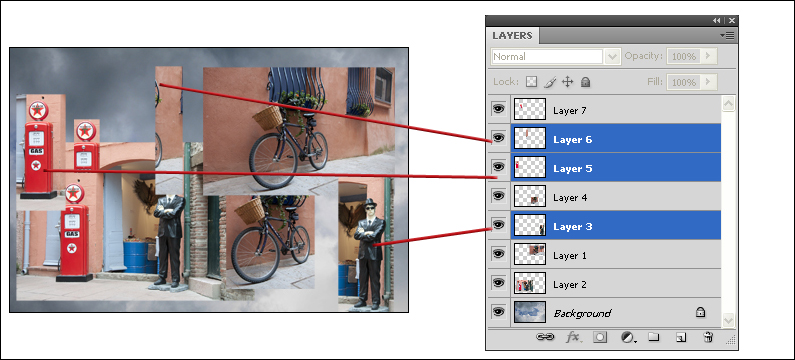
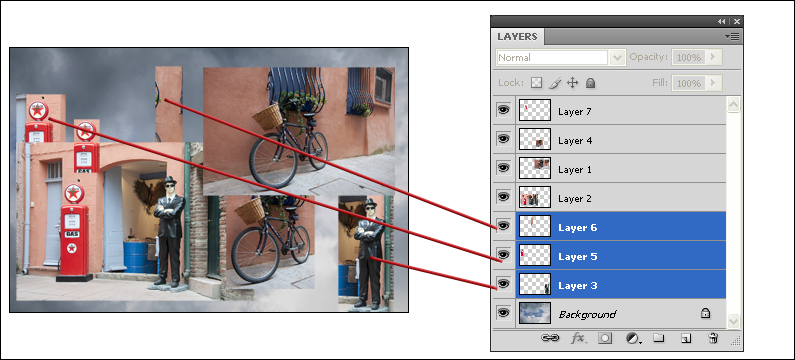
Moving several layers together: With several layers highlighted it's also possible to move them as a body to another position in the stack (same procedure as for moving a single layer).
The example below shows three layers selected, Layers 3, 5 and 6, (Ctrl + click each in turn) to be moved below Layer 2, immediately above the Background layer, this will hide parts of the image content on the chosen layers.