Digital Infrared Capture & Workflow
Adventures with Lab Color Mode continued
Clive R. Haynes FRPS
For an alternative and more flexible approach we're going to explore the subtle (and sometimes not-so-subtle) use of Level changes to Channel 'a' and Channel 'b'. To follow this route, return to the image starting point.
Look at the Histogram (if not visible, go to Window > Histogram - note this 'Window' option is not available on pre 'CS' versions of Photoshop, in which case observe the histogram as we proceed via 'Levels')
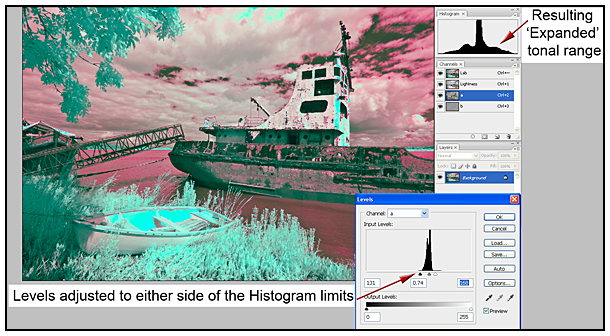
Activate Channel 'a', this reveals a narrow 'spike' of Histogram information which represents the narrow range of tonal information captured in this channel. What we seek to do is to expand the tonal range by adjusting 'Levels'. To do this go to Image > Adjustments > Levels. For the working example, I adjusted the black, white and mid-level sliders to produce the result shown below. Adjusting 'Levels' controls of the amount and distribution of magenta / green for the Channel 'a'.

Adjusting
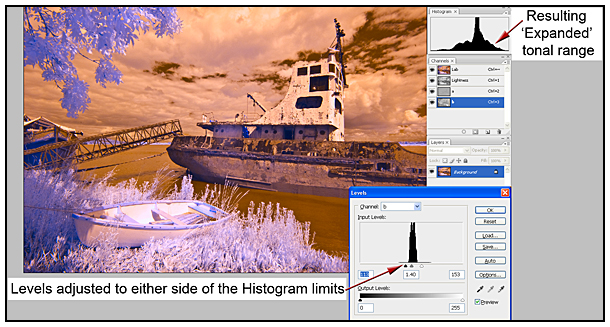
'Levels' for 'Channel b' will control the distribution of yellow / blue
offering a very different tonality,
see below:

Click the link below to continue and discover more about 'Adventures with Lab Mode'