Here's a subtle technique that will, for the right image, create a softly romanticised version of the original.
The basics steps comprise copying the original image, turning the picture to monochrome, then using the copy to overlay the colour information only with blur applied.
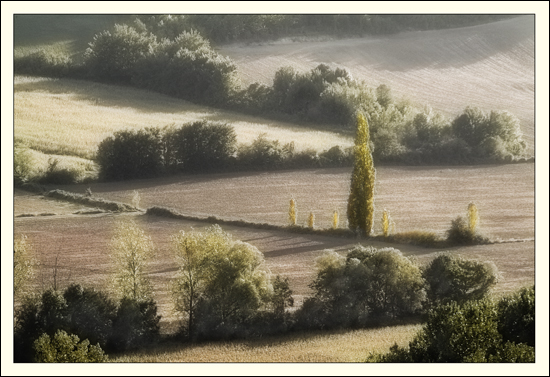
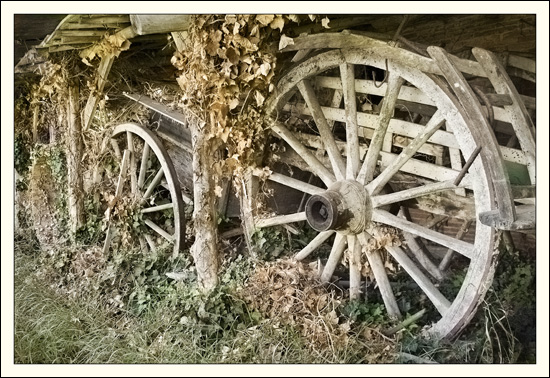
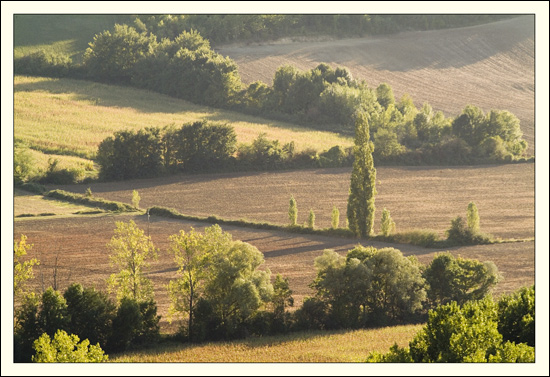
The effect is subtle and shows more clearly on a print. The example below illustrates what can be done but you'll need to carefully compare the 'before & after' images - As I mentioned it is subtle but the effect is there.
The colour has spilled and merged from one area to another and this has the effect of pleasingly homogenising the colour tones.
(Quick-Keys
shown in brackets)
After opening the image, make a copy layer by either dragging
the Background layer onto the New Layer icon at the base of the Layers palette
or by Select > All (Ctrl + A)
Edit > Copy (Ctrl + C)
Edit > Paste
(Ctrl + V)
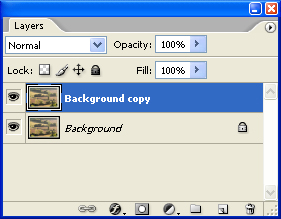
Turn off / deactivate this layer by clicking on the eye icon.
Return
to the Background Layer and make this 'monochrome'.
This can be done either
by: Image > Adjust > Desaturate (Ctrl + Sift + U)
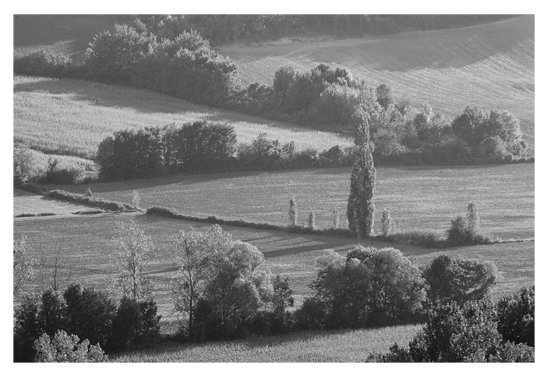
Alternatively,
'Channel Mixer' can be used to refine the tonality of the monochrome image.
Channel
mixer allows more adjustment. To use this method, click on the Adjustment Layer
icon at the base of the Layers palette (half black / half white circle) and from
the drop-down menu, choose 'Channel Mixer'.
Tick the 'Monochrome' box.
Adjust
the 'slider' controls to give the most satisfactory black & white image.
Click
'OK'.
See 'link' below for more information re 'Channel Mixer'
Next
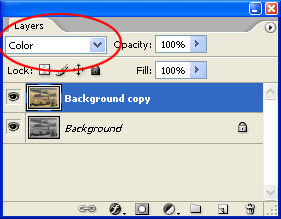
Return
to the copy layer and reactivate it (click on the eye icon).
Set the 'Blend
Mode' for this layer to 'Colour' ('Overlay' is another option). The menu for 'Blend
Modes' can be accessed via the drop down menu arrow at the side of the word 'Normal'
- top left of the Layers palette.
Go
to Filter > Blur > Gaussian Blur.
The amount of blur to apply is dependent
upon the image file size - the larger the image file, the more blur you'll require.
Move the slider to gradually blur the colour. You will notice that as the blur
increases the colour wash effect will gradually become more diffuse and harmonisation
of the colours will begin.
When there is sufficient blur for the picture and
the mood you wish to convey, click 'OK'.
As a rough guide, the image from which this working example was taken was a 20mb file and I used a Gaussian Blur setting of 35.
That's it.
The final
result is below.
The 'Before & After' images are difficult to compare as
jpeg pictures. In reality, they are, A3 prints and the 'Diffuse Colour' version
appears more pleasing and gentle with an old-world, romantic atmosphere.