How to make 'Corner Tabs' for a Picture
Clive R. Haynes FRPS

The method described in the following notes will describe how to make four 'corner tabs' for an image to give the impression that the corners of the picture are 'tucked into' the style of corner retaining tab sometimes used in photo albums.
To accomplish this task it will be necessary to have knowledge about Photoshop features and tools such as, Transformation, Layers, Adjustment Layers, Layer Mask, etc.
The method deliberately incorporates several Layers and Layer Groups. The intention is to keep as much information as possible available for editing. This way the 'tabs' may be refined and used as a 'template' for other suitable images.
This is how to proceed:
Set the Foreground colour to Black and the Background colour to White
Make a (duplicate) copy of the Background Layer
Activate the Background Layer and fill this layer with white (Edit > Fill > Use > White > OK)
We need some additional space in which to work
Image
> Canvas Size
Extend the canvas area to these settings (make certain that
'Relative' is not ticked)
Use the 'Percentage' setting
W = 130%
H
= 130%
Click 'OK'
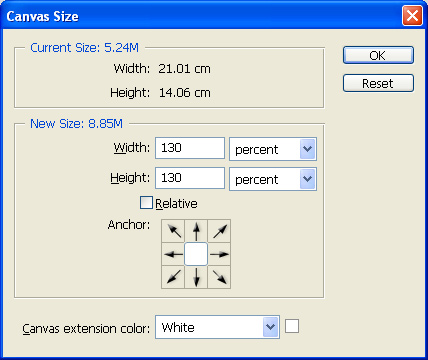

Above: A broad white border now surrounds the image
Making
the first 'Corner Tab'
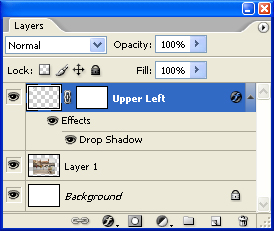
Create a New (empty) layer above the Background
Copy Layer
Using the Polygon Lasso Tool, click on the top right corner position at the upper part of the lower end of the (virtual and presently invisible) 'tab' you wish to 'draw'
To ensure that the straight line from the Polygon Lasso Tool extends at 45°, hold down the Shift key (this makes the Polygon Lasso Tool operate at 45° intervals). Keep the Shift' key held down throughout this operation to ensure a 90º angle for each corner
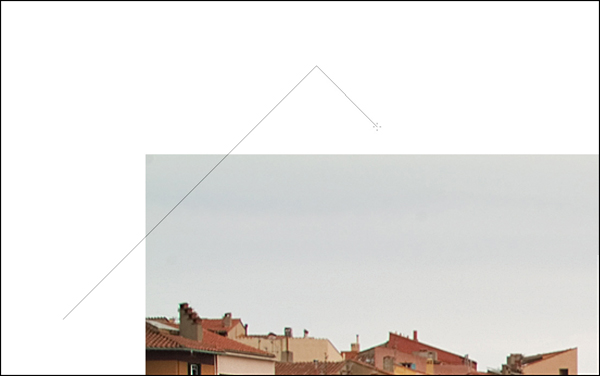
Note: If you make a mistake at anytime during this operation, simply click 'Delete' and the Polygon line will jump back one step
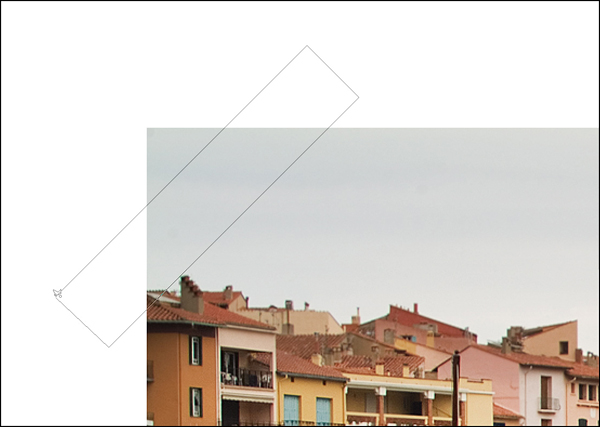
Extend the Polygon 'line' to the upper right corner of the 'tab' shape you're 'drawing'; continue holding the Shift key down and make a short line to complete the top corner and click at the lower part of this section of 'tab'; still holding the Shift key down, extend the Polygon line to the lower (left) corner position, click again. All you have to do now is return to the starting point at the lower tab and complete the selection. You should now have a diagonal 'tab' showing as 'marching ants'
Edit > Fill > Use > White > OK
Deselect (Ctrl + D)
As part of the 'tab' is against the white background it will not be easy to see, however the next step will render it more obvious
The idea is to make one complete 'corner tab'. This 'tab' will then be available for copying, pasting and applying to the next corner position

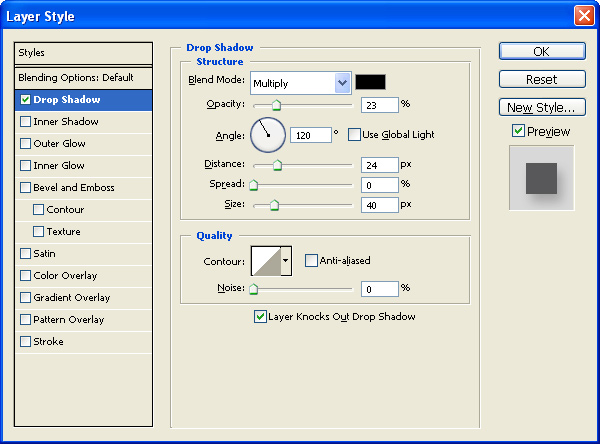
Drop Shadow
Click on the 'Effects' icon 'f' at the base of the layers palette
From the drop-down menu, choose 'Drop Shadow'
In the 'Drop Shadow' dialogue box type in the following values:
Opacity:
23%
Angle: 145°
Distance: 24
Spread: 0
Size: 40
Global Light
- Not Ticked
Click OK