Masking Techniques
Using Channels
Continued.....
Clive R. Haynes FRPS
Option 1 : To alter the colour of the sky
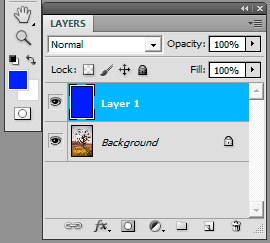
In the Layers palette, make a new Layer above the Background layer.
Make the Foreground Colour the shade you need. (In this example I'm going for a blue sky).
Fill the new Layer (Edit > Fill > Use > Foreground > OK) with the colour.
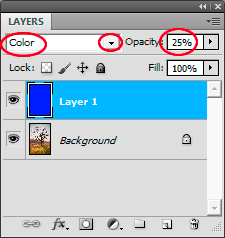
Swap the Layer Blend mode for the Layer to Color (click on the drop-down arrow to the right of 'Normal' in the Layers Palette and choose 'Color'). Set the Opacity to around 25% or so as a starting point.
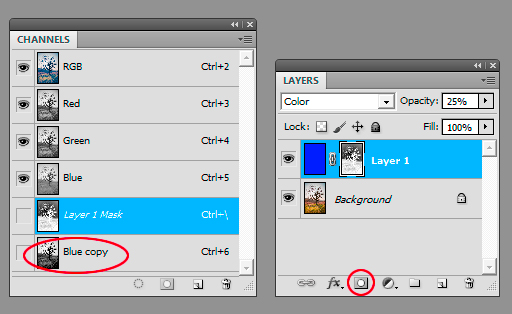
Hold down the Ctrl key and (left) click on the Channel Copy you made. Marching ants' appear around the selection.
Click on the Layer Mask icon at the base of the Layers palette and the selection will cut out around the mask.
Note: In the Channels palette a new Alpha Channel will appear, showing the Layer Mask.
NB. Should you need the inverse selection to be the active area', go to: Select > Inverse (Ctrl + Shift + I) before clicking on the Layer mask icon.
Use the Brush tool and/or a Gradient to edit the mask to your satisfaction. It's often much easier to edit the Layer Mask by revealing the mask itself. Do this by holding down the Alt Key and clicking on the Layer Mask thumbnail in the Layers palette. The mask will be revealed as a high-contrast image. Work directly on this and when you're ready Alt/click on the mask thumbnail once again to review the full image.
Adjust the Layer opacity to suit.
As an alternative (or additional) option) a new sky can be added. Click on the Masking with Channels link below .....