Digital Make-Up
(Photoshop CC)
Continued ............
Clive
R. Haynes FRPS
The
next step is to work on the other eye and this is very easy.
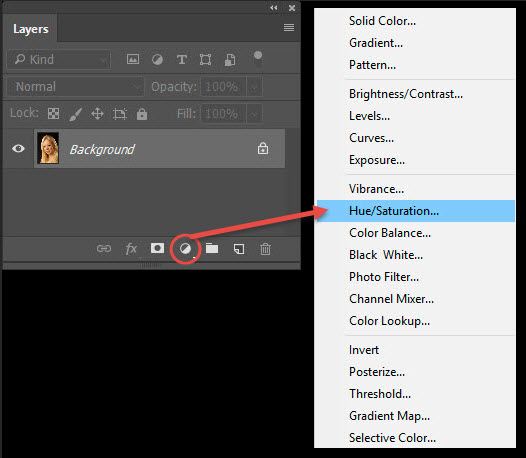
The Adjustment Layer
is open, ready and waiting to deliver the shade chosen to anywhere in the image,
all we have to do is reveal it by using the Brush Tool.
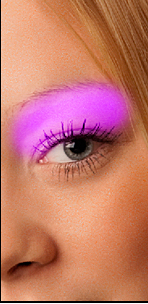
Continue with the soft-edge brush and with white as the foreground colour, paint the eye-shadow into the area above the other eye. Changing the opacity of the brush will alter the density (a graphic pen & tablet is particularly useful for this). If you wish to correct an error, swap to black as the foreground colour. In this way the area of eye-shadow for both eyes can be extended, reduced and refined.
Alter the Layer Opacity to suit the subject. We now have two eyes done.
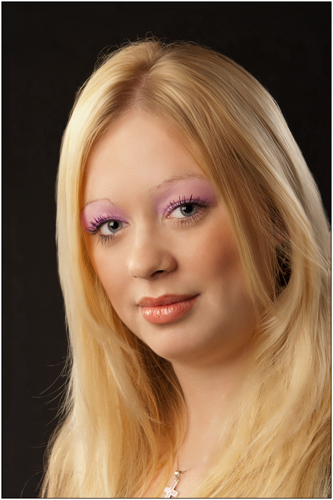
I can't say that I'm really wild about the colour for the eye-shadow or therather wide area covered. Here's the way to change it:
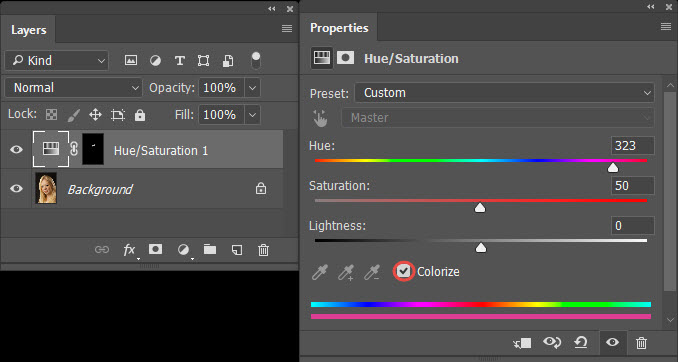
Return to the Hue & saturation Adjustment Layer, double-click the left-hand rectangle
The Hue & Sat box opens again. Adjust the colour to your preference. I'm going for a warmer, darker tone this time.
Click 'OK'.
Adjust the Opacity for the Adjustment Layer to your preference.
.png)
Using the same method, the next stage is to apply make-up to the lips and cheeks. You'll end up with three Hue & Saturation Adjustenet Layers (one for each area). The finished result is above.
Tip: Should you wish a darker shade of colour, revisit the Hue & Saturation Adjustment Layer and reduce the setting for the Lightness slider.