Linking Layers in Photoshop CS2
Clive R. Haynes FRPS
The function exists to enable the image on one layer to be 'coupled' with an image, or images on another layer or layers so that they may be moved all together. For example, if you had a composite image that, say, included three people, one per layer, exactly aligned, as you need them, they will remain separate. If you needed to move the three people to a fresh position but retain the individual relationships, you would choose the 'Move ' tool, move each of them individually, then re-align the three. This is obviously time-consuming and inefficient. By 'linking' the three layers, all three can be moved at one time - and the original spatial relationships maintained. This is simple and efficient.
How to make
the 'link'
Please remember that the 'Background' layer is not available
for 'linking' as it is 'locked'. The 'Background' layer can be linked and moved
but you need to rename it first (double-click on the layer and either accept the
default 'Layer 0' or name it yourself).
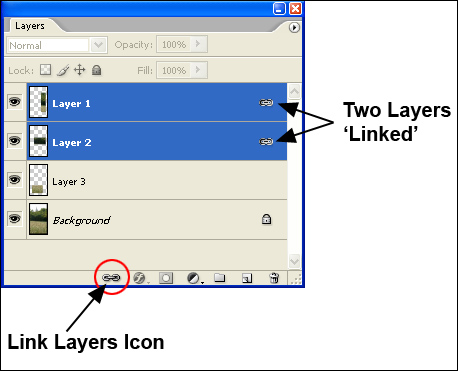
Once you have decided upon which layers are to be 'linked', click on one the layers to make it 'active' (the layer becomes blue).
To
select the other layers to be linked, hold down the Ctrl key and click on the
individual layers (these become blue as you click).
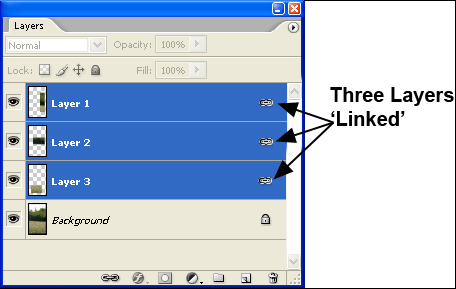
To include a group of
adjacent layers, highlight the first one, then hold the Shift key down and click
on the last one and behold, the set of layers all become blue! Should you inadvertently
include a layer in error, Ctrl - clicking on the layer in question, will deselect
it.
You now have two or more layers ready to be linked. With the layers so selected, click on the 'Link' icon at the base of the Layers palette - it looks like a small section of chain. After clicking on the link icon, all selected layers have the 'Link' symbol. The 'linked layers' can now be moved as a body.
Highlight the layers as before and click on the link icon once again at the base of the Layers palette. The 'links' disappear.
Select the required layer(s)
Click on the 'Link' icon at the base of the Layers palette - confusingly all the 'links' disappear. However clicking on one of the layers that should still be linked, reveals the others that remain linked.
Shift-click on the 'Link' symbol on layer you wish to temporarily unlink. A red cross appears over the link symbol.
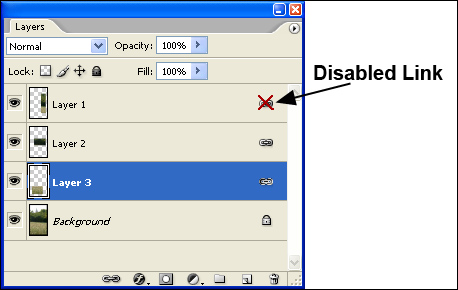
How to re-enable
a 'disabled link':
Shift-click on the red cross over the 'Link' symbol
on the layer, the cross disappears.