Digital Infrared Capture & Workflow - continued
Clive R. Haynes FRPS
Working in Monochrome
Although 'Channel Swapping' and adding the B&W Adjustment Layer remain my recommend method the following suggestions are sometimes worthy of exploration.
For onward conversion
and management of an image in monochrome, the image can be treated in
several ways; it's a matter of experiment to discover which one suits
any given subject the best.
The most usual methods will be: conversion to mono in the RAW file reader, or once opened as a Photoshop (.psd) or .TIFF file, the options are, 'Desaturation', monochrome via 'Channel Mixer', Black & White (CS3 on), Gradient Map,'Calculations' (definitely worth exploring) or conversion to Lab mode utilising the 'L' channel only.
Please note that wherever possible you should use an 'Adjustment Layer' as this will allow maximum flexibility and editing.
Converting straight to 'Grayscale' (Image > Mode > Grayscale) is not recommended as the 'conversion' is frequently bland (although one can have the occasional 'lucky strike') and as colour channel information is lost, you'll need to swap back to RGB Mode (Image > Mode > RGB) for any toning and tinting, except for Duotones for which the mode needs to be Grayscale.
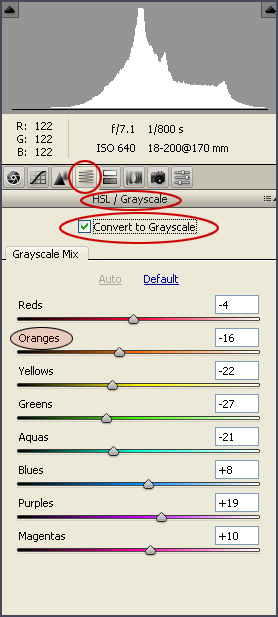
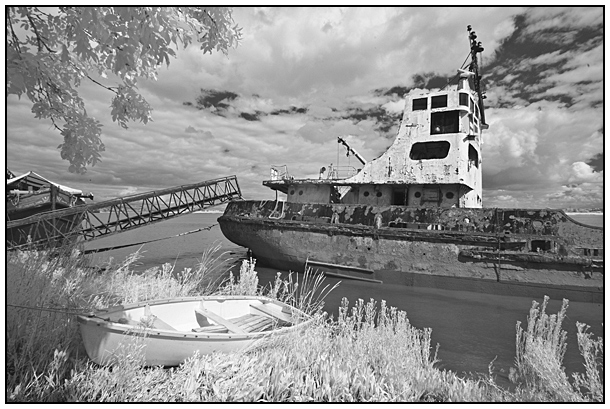
The image below has been opened in Bridge (CS3) and converted using HSL / Grayscale and ticking the 'Convert to Grayscale' box - see below. Before opening, it can be helpful to decrease the 'Oranges' slider as this will give some increased contrast (in this image in the sky and water) and give a 'boost' prior to opening.

When reducing the level of the 'Oranges' slider, you may notice an increase in 'noise' in RAW preview, however, magnifying the image will show that the noise is minimal. When opening the image in Photoshop the 'noise' will probably be at an acceptable level.

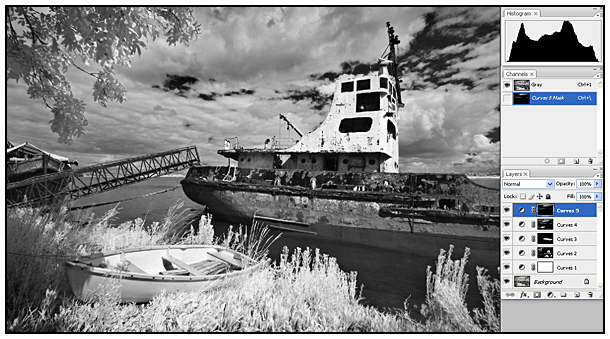
The image below shows the same image after adjusting 'Curves' to provide more localised contrast and 'bite'. In this instance five separate 'Curves' Adjustment Layers were used to target specific areas of the image.

Click the link below to continue and discover something about 'IR and Water'