Diffusion Blur & Glow
Clive R. Haynes FRPS
Options
and Ideas for continuing the Diffusion & Blur Technique
Selectively
Restoring Original Detail & Sharpness
Make a copy layer of the original (Background )image and position at the top of the Layer stack. Apply a 'Hide All' Layer Mask (do this by Alt-clicking upon the Layer Mask icon at the base of the Layers Palette).
Use the Brush Tool with White as the Foreground colour to reveal areas of sharpness as required.
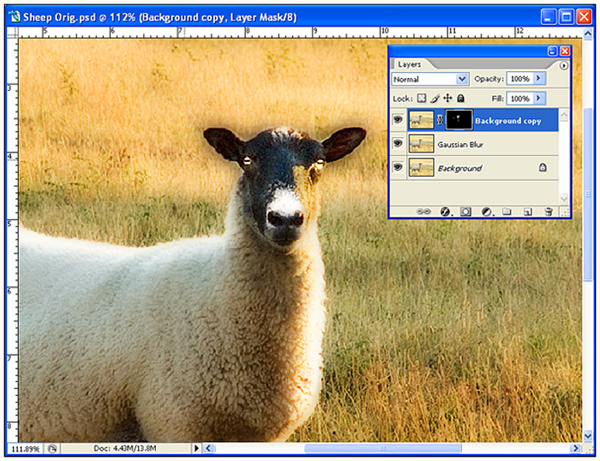
Above:
'screen grab' showing restoration of detail & sharpness in selected areas
- eyes, top of head and coat
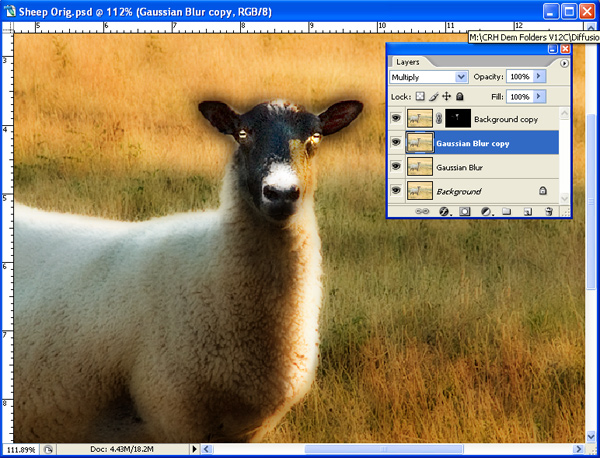
Intensifying
the Diffusion Effect
Make a copy of the blurred layer and place it above the existing blurred layer, with both layers in 'Multiply' Blend Mode the image will be intensified. The amount of intensity can be controlled via Layer Opacity or by adding a Layer Mask. See 'screen grab' below
Make a copy of the blurred layer and place it above the existing blurred layer, with both layers in 'Multiply' Blend Mode the image will be intensified. The amount of intensity can be controlled via Layer Opacity or by adding a Layer Mask. See 'screen grab' below
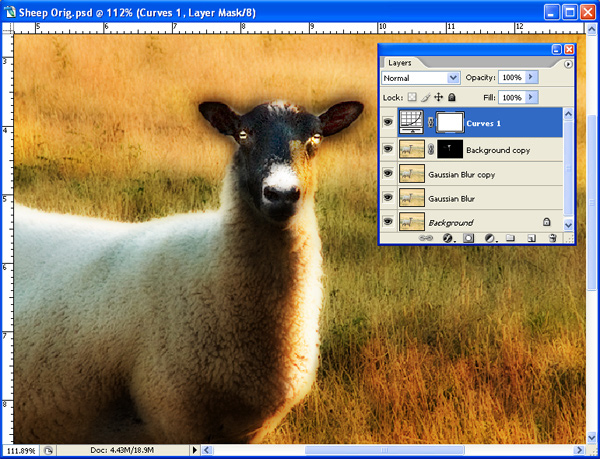
Manage
the Intensity
Add a 'Curves' Adjustment Layer' to alter the contrast of
the image and apply selectively by using either a Brush Tool or a 'Gradient' on
this Layer.
See 'screen grab' below