Using ' Curves' in Luminosity Blend Mode
Clive R. Haynes FRPS
Most people tend to make tonal adjustments in 'Curves' that affect both colour and luminosity content simultaneously.
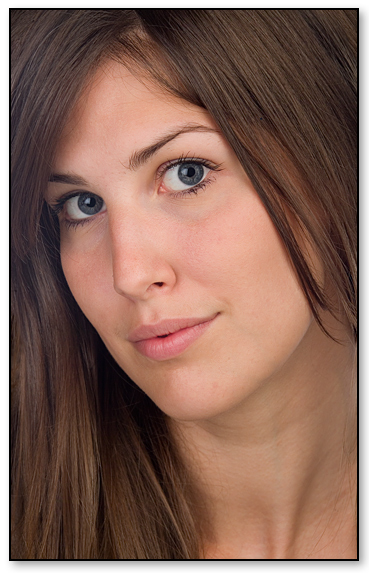
When adjusting and modifying the shape of the curve in 'Normal Blend' (the default mode) we affect the composite RGB content of the image. For small changes, the alterations to colour, although present, are not usually significant. However when making more dramatic changes to the tonality of an image by lightening, darkening or increasing the contrast range, changes to the colour content become more pronounced and frequently undesirable.
It's often better practice to apply tonal changes to the underlying black & white (Luminosity) content of the image when we need to alter contrast. And to achieve this it's preferable to use an 'Adjustment Layer'.
The Adjustment Layer' route is the preferred option, as not only is it 'non-destructive' but also it has a useful 'mask', which is invaluable for the selective application of the adjustment needed.
Creating
a 'Curves' Adjustment Layer
At the base
of the Layers palette, click on the half black / half white circle icon.
From the 'drop-down' list that appears, choose 'Curves'.
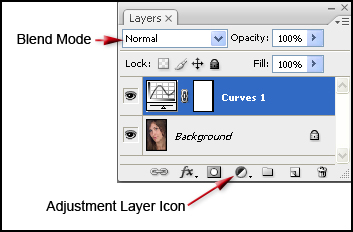
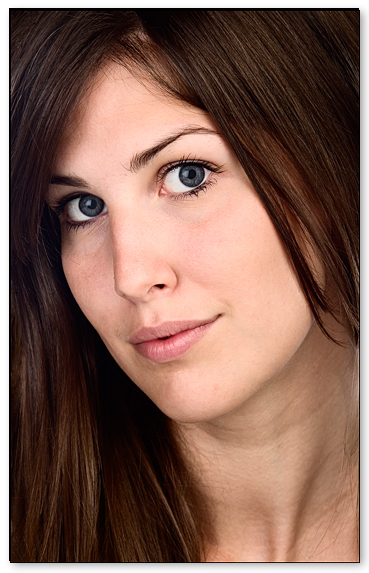
The new Adjustment Layer will appear together with the 'Curves' dialogue box. For this exercise I've set the 'Curve' to an 'S' shape to increase contrast' as below.
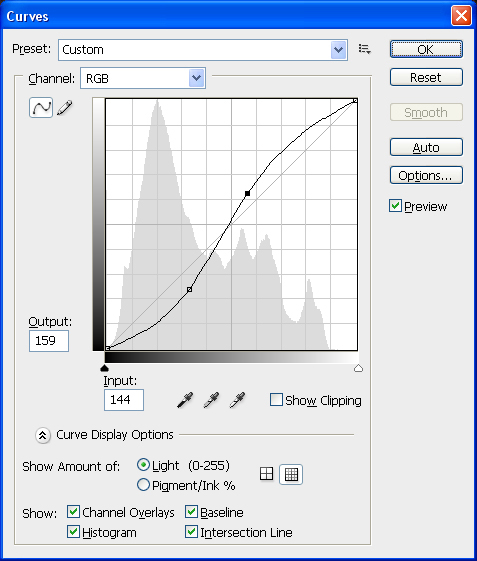
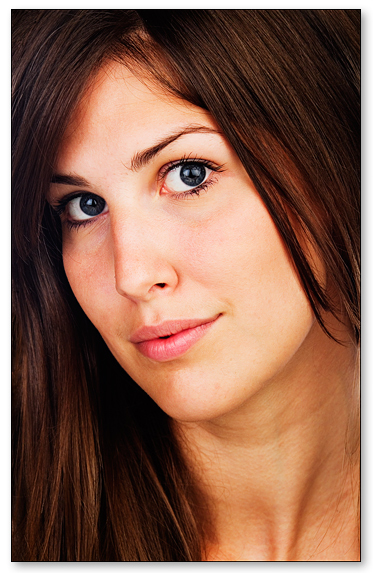
The next example shows the effect of choosing 'Luminosity Blend Mode' with the identical adjustment to the shape of the Curve.
To change the 'Blend Mode', click on the drop-down arrow to the right of the 'Normal' box (at the top lh of the Layers Palette) and from the drop-down (blend) menu, choose 'Luminosity'.
The alteration to the contrast has become more subtle as it now emphasises the change of underlying tone rather than colour.
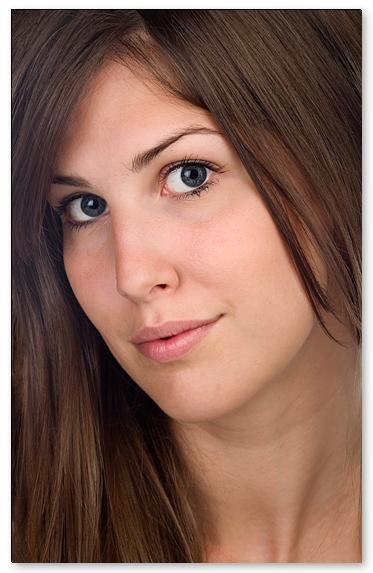
in 'Luminosity' Blend Mode
in 'Luminosity' Blend Mode
When 'painting' on the 'Layer Mask' associated with the 'Adjustment Layer'. White will apply the change and black will undo it, judiciously swapping between the two will produce a pleasing result.
One final note: Working in 'Luminosity Blend Mode' is equally applicable for the adjustment of 'Levels' too