If you intend trying different ideas and techniques for the border area, then it's a good idea to save the selection for future use. The selection can then be quickly reapplied.
Select the border area by using the Magic Wand tool
Go to Select > Save Selection > and give the selection a name ('Border') and click OK.
When you wish to use the selection again, go to: Select > Load Selection > and choose the name of the selection you saved. Click 'OK'.
After filling the border area with colour it can always be changed. Re-select the border area.
Go to Edit > Fill > Use > Foreground (or Background) colour.
Filling by this route enables you to decide upon the Opacity (saturation) of the colour by altering the figure (1 - 100%) in the 'Blending' area inside the Fill dialogue box.
To fill colour by this method it's not necessary to make a selection first as the Paintbucket tool will seek out like colour tones and replace them with Foreground colour.
First, choose a Foreground colour.
Next, select the Paintbucket tool then click within the border area and hey presto! - A new border colour has appeared.
Look at the Paintbucket 'Options' after selecting 'Paintbucket' tool to alter its Opacity if you wish.
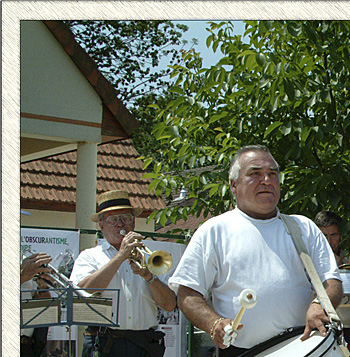
Textured
Border
Once the border has been selected by the Magic Wand or by any other
convenient selection method, filters may be applied.
Experiment by adding
'noise' to produce a 'grainy effect'
Go to:
Filter > Noise > Add Noise.
Choose 'Gaussian and click 'Monochrome' (suggested).
Set 'Amount' to your
personal taste.
To
add some directional streaks to the noise texture:
Keep the selection active.
Return to the filter menu and add brush strokes
Go to:
Filter > Brush
Strokes > Angled Brushstrokes.
Numerous variations and combinations are possible.
Pattern
Border
You can copy a 'pattern' into your border. Start by using the rectangular
Marquee tool to select an area within the image (or within another image). Next,
go to Edit > Define Pattern.
Note: the 'pattern' must be created from a square-corned selection so make certain that in the 'Options' for the Marquee tool that 'Feather' is 0px.
Select the border area by, say, Magic Wand (this works best on a plain colour tone) so if you're experimenting after making a texture border - return to a previous state via the History palette or use the Select > Load Selection route described earlier. Alternatively, use the marquee selection tool to define the border inner limits and Inverse the selection area (via Select > Inverse).
Once
the border area is selected go to:
Edit > Fill > Use > Pattern
Choose
the pattern you've just 'defined' from the thumbnails presented.
Hey presto
- another interesting border!
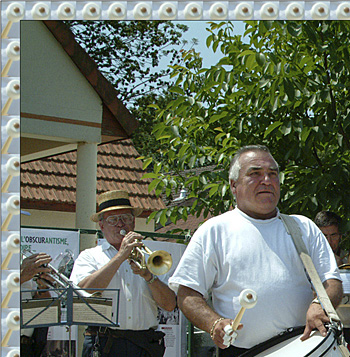
Tip1: When in the Edit > 'Fill' dialogue box, you can alter the Blending Mode or change the Opacity to modify the pattern effect.
Tip 2: After defining the pattern, create a new (empty) layer, then once the border area has been reselected, make certain that the new layer is active and 'fill' the border area with the pattern. Using a separate layer gives greater flexibility.
Cloned
Border
This type of border can appear rather like a 'Patterned Border'
but it's more random, more 'artistic' and less 'mechanical'.
The best way
to make a 'cloned border' is to start by creating a new layer.
Select the
border using Magic Wand or another selection tool or Select > Load Selection.
Using the Clone
tool (Clone Stamp) and with the Background (picture) layer active, select/target
your starting point (Alt + click). Choose 'Align' (tick) or 'non-Aligned' (no
tick) in Clone Stamp Options - it depends on the effect you wish to create.
Activate
the new border layer, choose a suitable brush size then clone inside the selected
area. The cloning effect will stop at the edge of the selection so your picture
content will remain tidy.
Don't
forget, if you wish to re-sample / re-target your cloning area on the main image,
you must activate the image layer first, or choose 'Use All layers' from the Clone
options.
As the border is now on its own Layer - it can be treated independently
- just like any other layer, so many more options are available.
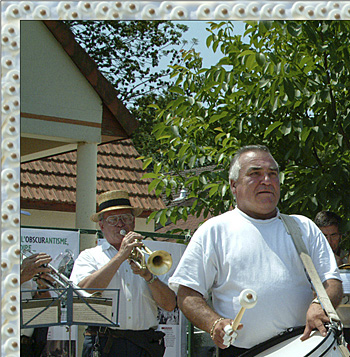
An elegant and simple 'pencil-line' border surrounding the image can easily be made by either successively expanding the canvas size or by 'stroking' a Selection.
Go to Image > Canvas Size and expand both width & height by, say, for A4 size, 1cm, using white (or colour of choice)
Expand again by 4 pixels (w & h) using black as the colour.
Expand again by 1cm (w & h) using white (or whatever).
The 'pencil-line' border can be added within the area of an existing border by using the Marquee tool to define the position for the line.
Next:
Go to Edit > Stroke
Choose width 2 px, Colour, Black (or whatever you prefer) - click on the colour square to show the 'colour picker' and choose colour - OK
Choose 'Inside'
Click 'OK'.
Combinations
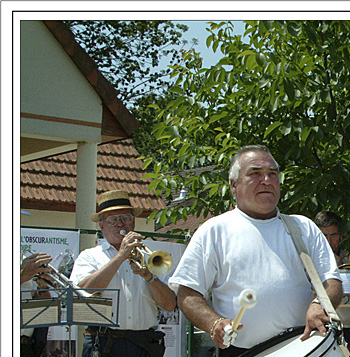
Try combining some of the above border ideas, for example the 'Texture
Border' could be combined with the 'Pencil-line' to pleasing effect. See below.
Many
other options are available, including those of adding mitres and shadows to borders
to simulate 'inset framing' effects.
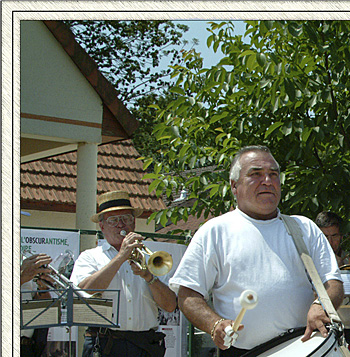
Making a border will enhance your picture.
However, remember that its presence is as a supporting rôle and as such should not detract from the picture content.