Make an
'Arty' / 'Painted-on' Border
Clive R. Haynes FRPS
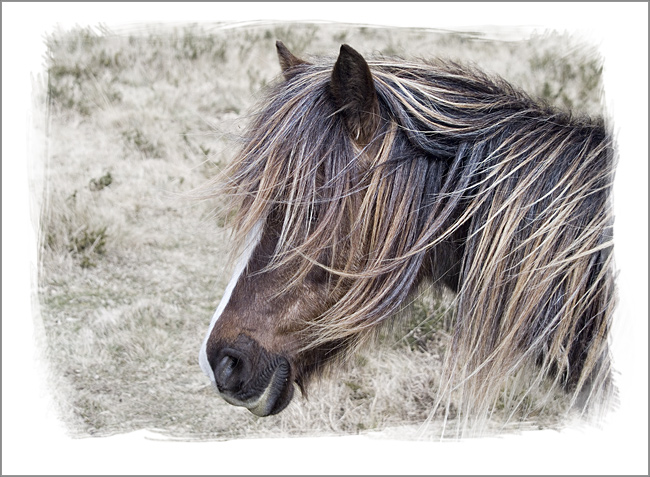
An attractive and sympathetic border can be added to an image to emulate the 'alternative technique' of 'Painted on Emulsion' or 'Liquid Emulsion'.
When coating media with emulsion frequently the effect was one of 'brushed edges'. This was a sought-after appearance and immediately placed the print in the 'Fine Art' category. We can emulate this edge effect digitally. It's simple to make and the 'mask' created can be re-used and modified to suit other images.
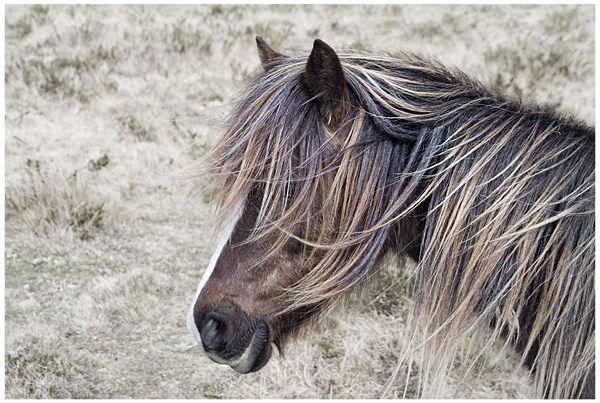
Open your image
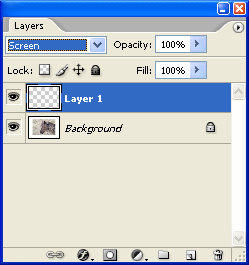
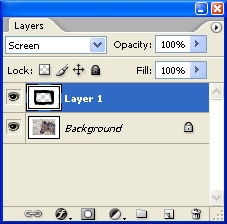
Create a new (empty) layer above the background by clicking on the New Layer icon at the base of the Layers palette (it's the one next to the Trash Bin) or go: Layer > New > Layer.
Change the Blend Mode of this new layer from 'Normal' to 'Screen' - do this by clicking on the drop-down arrow to the right of 'Normal' (top LH of Layers palette) and from the list, choose 'Screen'.
Expand the Canvas Size, making certain that the Background Colour is white before you start, or the Canvas Extension Colour (in Canvas dialogue box) is set to white. With 'Relative' un-ticked, try expanding the canvas width and height by 130%. Hopefully this will present sufficient working area. See below:
Working on the new layer you've just made, choose a suitable brush. I suggest a rough-edged brush - try one from the 'Spatter' range or 'Rough Round Bristle'. If your brush selection doesn't show these brushes, load more brush shapes by clicking on the fly-out arrow to the top of the Brush dialogue box (accessible via the drop-down arrow next to the Brush Size on the Options Bar) and choosing 'Load Brushes' - choose from the list.

Set the Foreground colour to white and the Background colour to black (quick way is to press the 'D' key on the keyboard - this restores the Default F/G - B/G colours).
Adjust the brush size to suit the image (via the Brush dialogue box or by using square bracket keys (to the right of 'P') the [ bracket key makes brush smaller whilst the ] bracket key makes brush larger. With white as the Foreground colour, 'paint' along the edge of the image and the rough edge will appear. To control and edit the edge and to paint back in parts of the image as needed, swap to Black as the Foreground colour (Tip: use the 'X' key to exchange the F/G - B/G colours).
Work on the edges until you are satisfied.
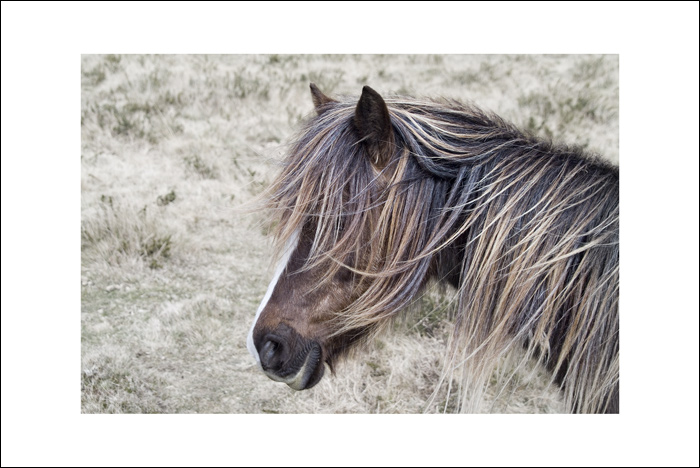
Crop the image to suit.
If you wish to apply the 'painted edge' complete 'as is' or as a starting-point to another image, simply copy it (Ctrl + A, Ctrl + C), then after opening the next image, use Ctrl + V to paste it in. Change the Blend Mode to 'Screen' and if necessary expand the canvas size and adjust the size of the edge mask by Edit > Transform > Scale.
An alternative method of transferring (copying) the 'painted edge Layer' to another image is to simply click on the 'painted edge Layer' and drag it onto 'the other' picture - and what's more, it'll keep the 'Screen blend mode' running.