Add a Misty Atmosphere
Clive R. Haynes FRPS
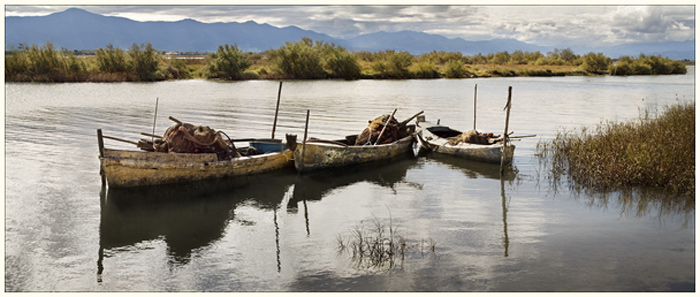
This is a simple and effective technique to add that essential ethereal atmosphere of mist and mystery to a scene that's, perhaps, just a little too factual - and you didn't rise quite early enough to capture the delicate mist! If you'll excuse the pun - it's a way of overcoming a 'mist' opportunity!
Tip: It's best to choose an image with appropriate lighting to help the atmosphere you wish to create and a scene that has strong foreground interest to give a feeling of 'depth'.
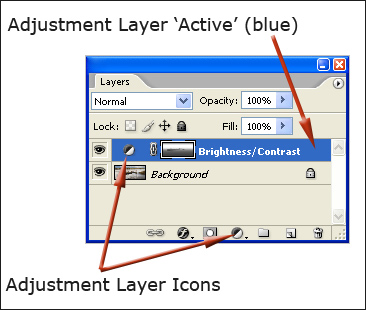
Open the image and click on the Adjustment Layer icon (half black / half white circle) at the base of the Layers Palette. From the drop-down list, choose 'Brightness / Contrast'.
In the Brightness & Contrast dialogue box were going to boost the Brightness (plus) and reduce the Contrast (minus).
Tick the 'Legacy' box and set Brightness to +85 and Contrast to -86. Click 'OK.
(Note: Older versions of Photoshop don't have the 'Legacy' option. 'Legacy' temporarily switches new versions back to the old way).
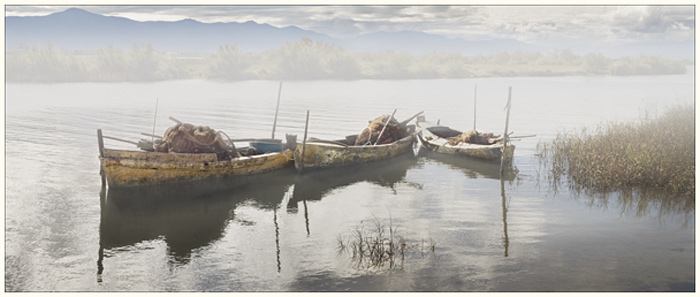
You now have a milky, murky looking picture - this is the 'mist' we're going to work with.
Please remember that the 'strength' of the 'mist' - from dense fog to gentle wraith can be adjusted by double clicking upon the Adjustment Layer icon within the Adjustment Layer you've just added. The dialogue box will appear and the sliders can be adjusted again.
Depending upon the image, you'll need to imply 'depth' within the mist and allow objects to appear through the haze.
The best way to remove areas of mist is to use the 'mask' facility within the newly created Adjustment Layer.
With the Brightness / Contrast Adjustment layer 'active' (that is, you've 'clicked' on the Adjustment Layer and the layer shows blue), make the Foreground colour, Black and the Background colour, White.
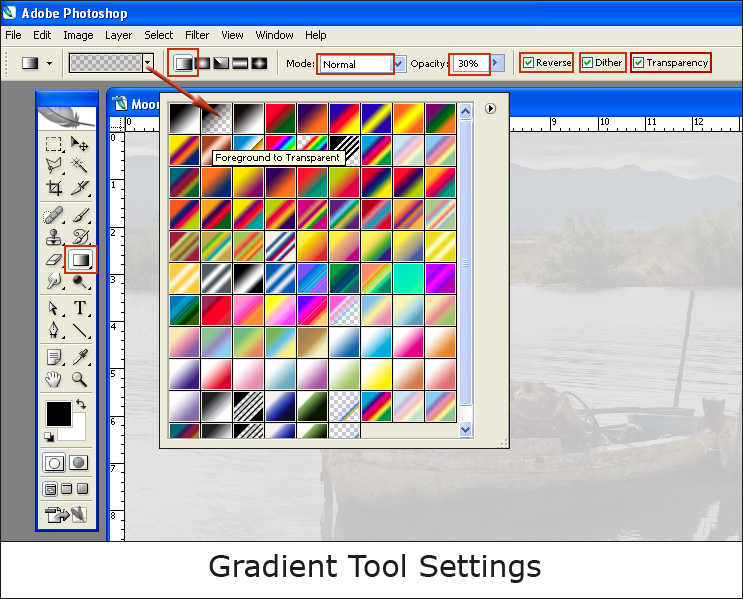
Next, select the Gradient Tool.
Look at the Options Bar and check the Gradient Editor (narrow) box. Make certain the Gradient is set to 'Foreground to Transparent'.
If this is not the case, click on the downward arrow, to the right narrow Gradient 'box', and from the list, click on the second small square in from the top left (Foreground to Transparent).
On
the Options Bar, set the Gradient options to be:
'Linear Gradient'
Mode:
Normal'
Opacity: 30%
'Reverse' - Tick
'Dither' - Tick
'Transparency'
- Tick
Hold down the Shift key and drag the Gradient 'line' from where you wish the mist to begin to disperse. The length of the 'line' determines the area covered - you'll soon get the idea.
Use
successive gradient applications to arrive at a convincing depth of mist.
Tip:
After 'dragging' the line for the Gradient, release the mouse or graphic pen before
releasing the Shift key.
For objects that need to penetrate the mist, offering a stronger presence, choose the Brush Tool and with Black as the Foreground colour, 'paint in' the objects. If you make a mistake or wish to edit the area, swap to White as the Foreground colour (quick-key to swap f/g - b/g is 'X') and 'paint' over the area. Remember also that the Opacity of the Adjustment Layer can be adjusted if needed.