Add Sunshine
Clive R. Haynes FRPS
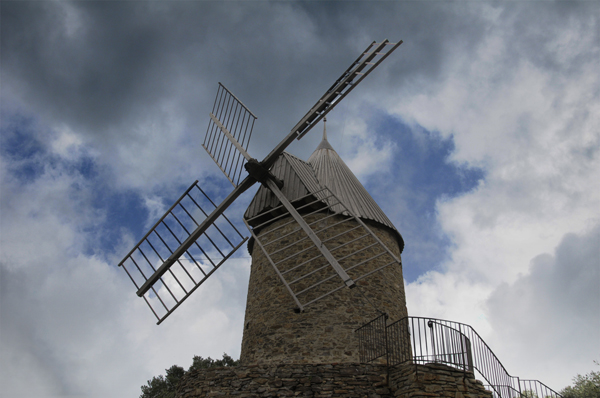
Sometimes we need to enliven an image by suggesting or creating the effect of sunshine, perhaps on a day when the sun only shone occasionally and never in the right place.
The technique described uses various methods and you'll need some familiarity with the following: Adjustment Layers, Curves, Layer Groups, Smart Filters, Transform-Warp Tool' and Layer Masks. It's certainly possible to achieve results using Levels' instead of Curves', and without Layer Groups' (they just make things tidier in this instance), and with a normal filter' rather than a smart' one. You can even use the Eraser' rather than a layer Mask' but it's not the best practice.
Here we go then
Open your image and roughly define an area where sunshine' would boost the picture. Use a Selection Tool to do this, say the lasso' or the rectangle'; it really doesn't matter as all you're doing is looking for the difference between what's selected and what's not but in the correct area.
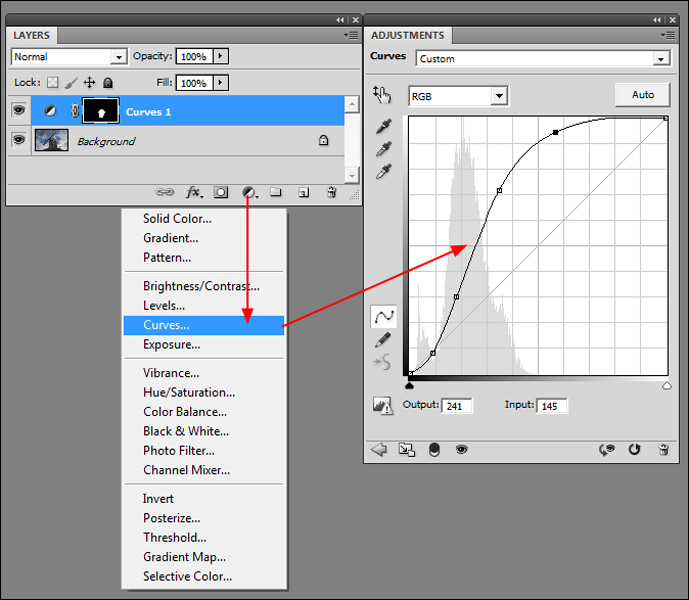
Fill the Adjustment layer with black (Edit > Fill > Use > Black > OK). The adjusted area with potential sunshine' disappears. The amount that you've pre-set for this Adjustment layer can now be applied to anywhere in the image. All you have to do is to paint' using White as the Foreground colour.
Select a suitable Brush and begin to apply the sunshine'. It's an easier task if you have a graphic pen and tablet', however a mouse' is OK and the work is made easier and more effective if you set the opacity for the brush tool (on the Options Bar for the brush) to a low level, say 20% and use successive strokes' to build density. Remember, this is an Adjustment' Layer' so you have the flexibility to remove brush strokes ny swapping to Black as the Foreground colour (Quick-Key' - use the X' key to eXchange' the F/G to B/G colour). Also, the settings for the Curve' can be modified by clicking on the Curve' icon on the Adjustment Layer itself to reveal the Curve' dialogue box'.
To refine the sunshine' additional Curve Adjustment Layers' can added using the method described above.
With perhaps three or more Adjustment Layers running, it's a good idea to pop them into a Layer Group' by Ctrl+Click activating the layers and dragging them onto the Create a new group' folder at the base of the Layers Palette. The Create a new group' folder is located to the left of the Adjustment Layer icon.
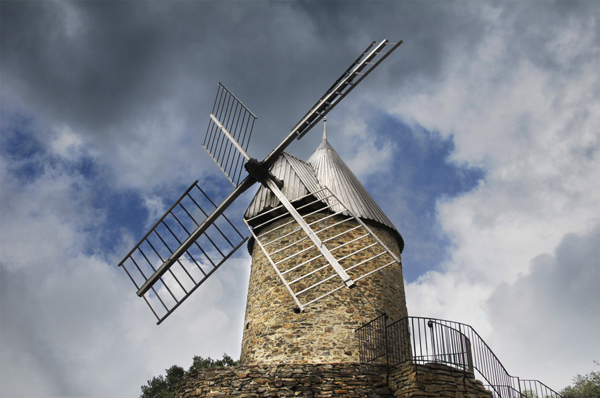
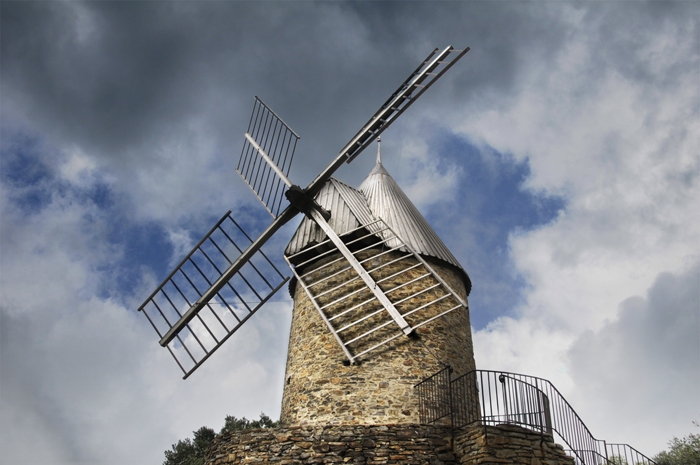
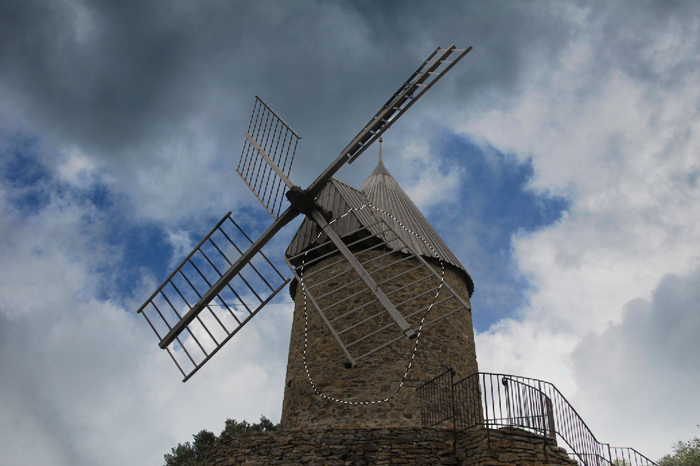
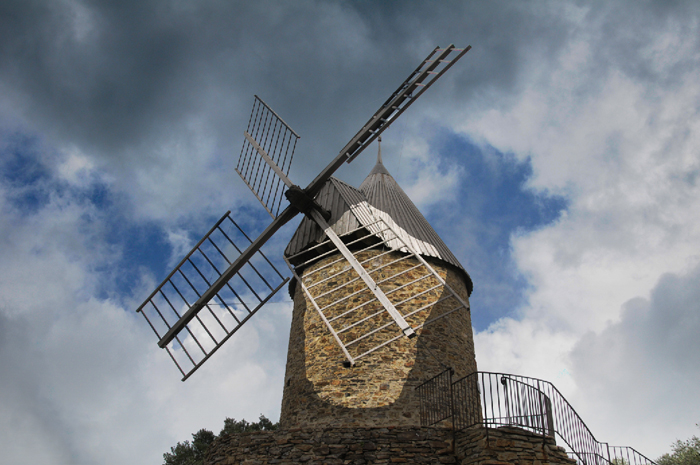
With sunshine added to the scene, it may appear less than genuine without shadows. In this example I've added a shadow' from the sail and made it appear upon the wall of the windmill.
I created a new, empty layer at the top of the layer stack'. I used Black as the Foreground Colour and by using a paintbrush, carefully traced the shape of the required section of the sail. Depending upon the task, a Pencil' may work to advantage as the edges are more defines, or if you're fortunate, you may be able to select the required area by Magic Wand' or the Quick Selection' Tools, whatever works best we're just looking for the shape here.
Once the shape has been defined, copy the layer (you may require it again).
Switch-off (de-activate) the original shadow layer'
Activate the Copy Layer for the shadow shape'.
For reference, I show a 'screen-grab' of the Layer Structure for reference further below.
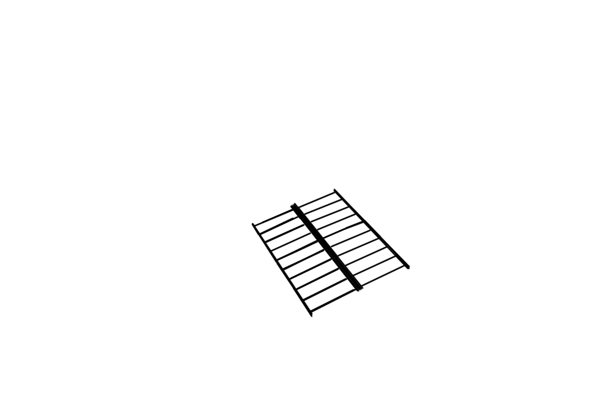
Add a Layer Mask' to enable parts of the sail shape to selectively erase.
Using the Move Tool, reposition the shadow'. If necessary use the Edit > Transform' menu including the Warp' option as, in this case, the shadow' is upon a curving surface.
Apply Gaussian Blur' to this Layer via the Filter menu. Adjust the amount of blur to be suitable. As a refinement and before choosing the Blur Filter, right-click the shadow copy layer' and choose Smart Object', next, from the Filter menu, choose Gaussian Blur' and set the mount required. The advantage of a Smart Layer' is that you'll be able to re-adjust the blur amount at any time without degradation. Once the shadow layer is more or less as you want it to appear, refinements can be further made by readjusting Blur' or editing the Transform'.
And that's it, a method of adding sunshine' and a shadow' to an image.