Sharpening with 'Darken' & 'Lighten' Blend Modes
Clive R. Haynes FRPS

This method which uses two copy-layers of the image and blending modes can reduce the appearance of 'halos' which can so often spoil an image.
Open the image and make a copy layer.
The quickest way to do this is to simply drag the (Background) image onto the New Layer icon next to the trash bin at the base of the Layers palette.
Repeat the step above so that there are now two copy images above the background Layer.
Go to Filter > Sharpen > Unsharp Mask.
Use these settings: Amount, 500%: Radius, 0.4%: Threshold, 0 (see below)
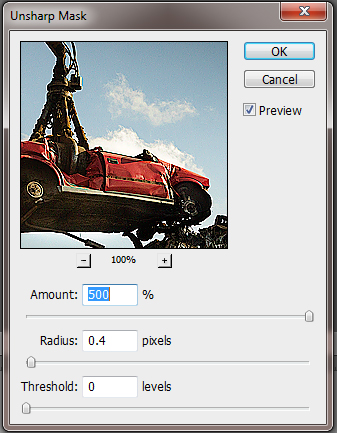
Click 'OK'
The image will appear very over-sharpened.
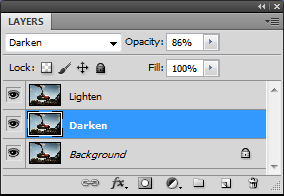
Rename this layer 'Darken'
Change the Blend Mode for this layer from 'Normal' to 'Darken'. To do this, click on the drop-down arrow next to 'Normal' at the top
left of the Layers Palette and from the drop-down menu list of Blend
Modes choose 'Darken'.
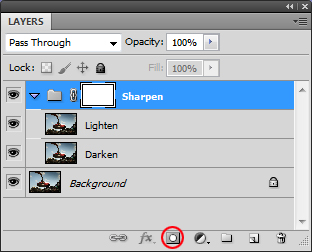
Activate the Second Copy layer and repeat the sharpening filter as above (quick key, Ctrl + F).
Rename this layer 'Lighten'
Change the Blend Mode for this layer from 'Normal' to 'Lighten'
Set the opacity of both 'darken' and 'Lighten' layers to 0
Gradually increase the opacity for the 'Darken' layer until sufficient sharpening has been achieved.
Gradually increase the opacity for the 'Lighten' layer until you can see 'halos' showing, then reduce the opacity a touch.
In practice you'll probably find that the amount of opacity for the 'Darken' layer will be at a higher setting than for 'Lighten', as illustrated in the screen-grabs above. Dark halos are far less noticeable than light ones.
A Refinement, Selective Sharpening, please click on the link below.......