Make it Rain (continued)
Clive R. Haynes FRPS
Change the Blend Mode for this layer to ‘Overlay’ and the 'noise' appears all over the image. You'll also notice the 'Smart Filters', 'Add Noise' additions to the 'Smart Object' Layer you created.
The next step is to add some direction or motion to the 'noise' to create 'rain'.
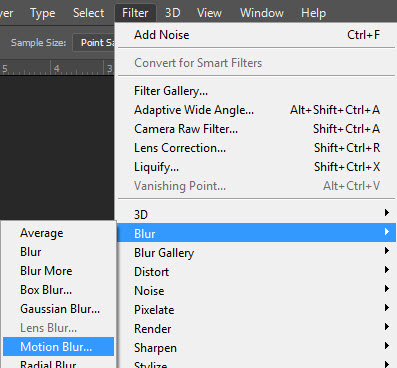
Go to
Filter > Blur > Motion Blur
For this image I set the Angle to around 62° with Pixel Distance at 30 but you will have your own preferences. Experiment until you're satisfied.
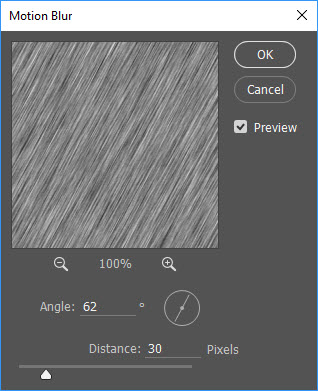
When you're happy, click OK.
By clicking on the white mask area of the 'Smart Filters' (see below) you can edit the density (opacity) and area covered by the 'rain' using a suitable brush. It functions as a Layer Mask for the Smart Filter.
If you didn't create a 'Smart Filter' then add a Layer Mask to the 'Rain' layer and using a suitable brush, edit as normal practice for a Layer Mask.
If you're unfamiliar with Layer Masks the use this link: Layer Mask
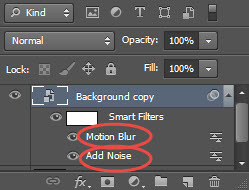
In the Smart Filters Layer you'll see the two filters now applied.
The whole point of a 'Smart Object' is that it allows further adjustments.
Both the Motion Blur and Add Noise settings can be revisited by double-clicking on the name of each filter layer. See below
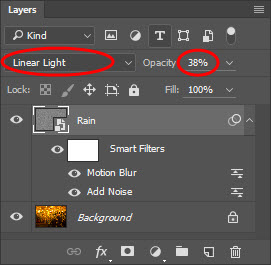
At this point it's worth experimenting with other Blend Modes in the Overlay family. I discovered that for this image, 'Linear Light' set at 54% gave a more convincing result. You need to experiment.
Some Blend Modes will introduce an unsightly fringe effect inside the borders of the image. With the 'Rain Layer' active, this can be removed by using the Edit > Transform > Scale facility and expanding the dimensions beyond the border of the image.
The 'rain' can be further refined by duplicating the existing 'rain layer' and making changes to mix in with the current rain effect. The quickest way to duplicate the 'Rain Layer' is to drag it onto the New Layer icon. Once visible label as, say, 'Rain 2' and make the required edits. The new effects can be subtly introduced using the mask in the 'Smart Objects' Layer.